

In the following tutorial we show how to create programs for the eQ-3 Homematic Window Sensor to transmit the state of windows and doors to a display, for example by means of system variables. You can also link Window Sensor directly to the Homematic radiator thermostat to save heating costs in winter by automatically lowering the thermostat when the window is open and then raising the thermostat again. How this works, we show in the new Funkyhome.de Smarthome Tutorial.
Here you can buy the Homematic Sensor. *Ad
Homematic lower radiator thermostat with open window …
The connection of a Homematic Window Sensor with a radiator thermostat is very easy, because instead of a program you can simply create a so-called “direct device link”, which therefore does not need a program at all.
Tip: If you don’t want the Window Sensor to lower the radiator thermostat temperature immediately, but only after the window or door has been open for 30 seconds or 5 minutes, for example, you can make this setting in the Window Sensor settings by entering the message delay in seconds there. This is especially useful to suppress a short opening of the windows. Thus, looking out of the open window or letting the cat out through the door has no effect on the radiator thermostat and therefore the batteries in the radiator thermostat.
Create direct window sensor link …
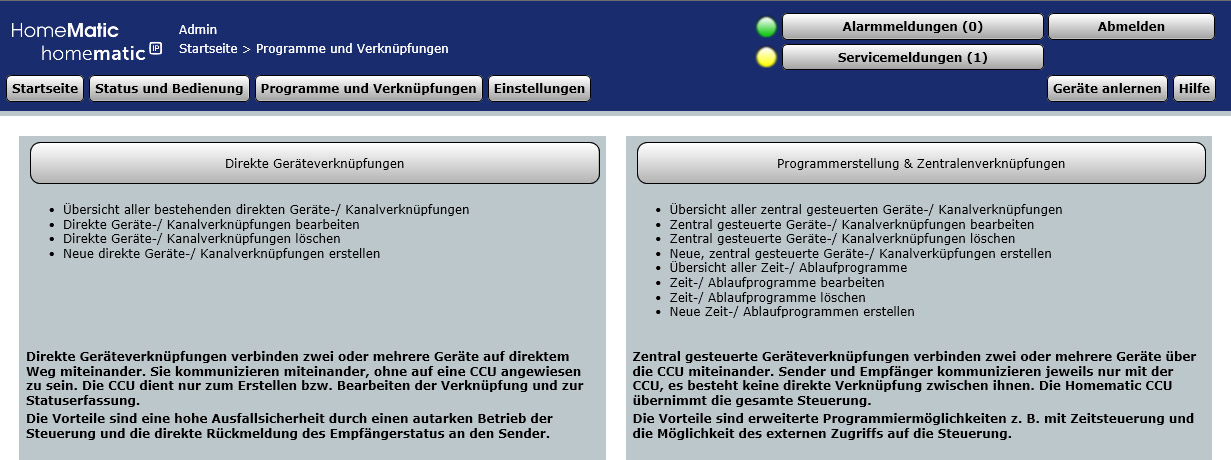
After the Teach Windows sensor and Teach radiator thermostat we can start the direct device linking in the Homematic CCU2 central unit via programs and connections.
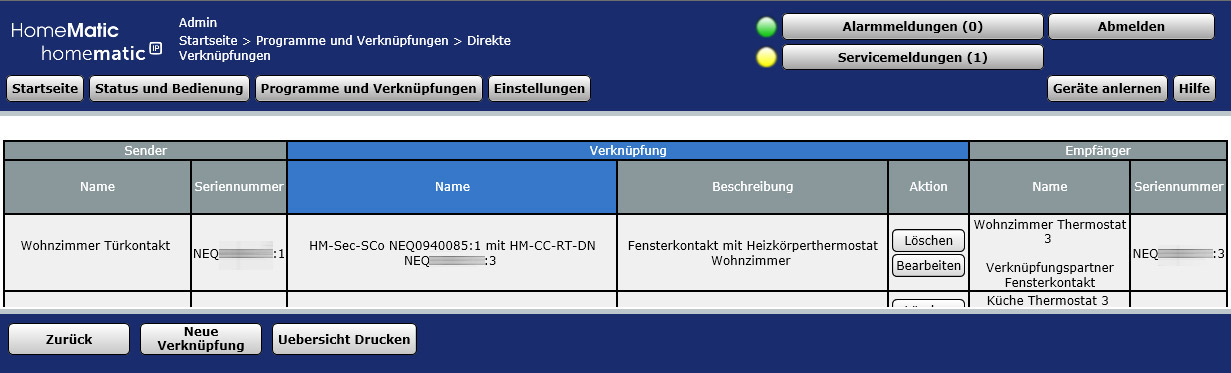
After calling up the “Direct device links”, all devices that have already been linked are displayed; here, as an example, the living room door contact is already linked to the living room radiator thermostat. How this works will be shown in the following instructions. At the very bottom we now click on “New Shortcut” to start with the Window Sensor Shortcut.
In step 1/3 we first select the desired HM-Sec-SCo Window Sensor, in our case it is the guest WC Window Sensor.

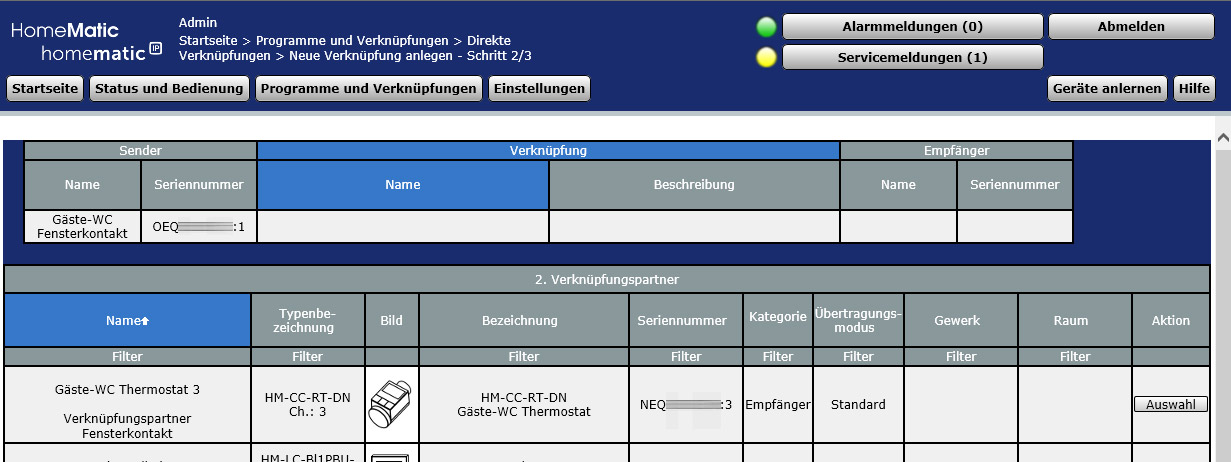
In step 2/3 we select the desired radiator thermostat, in our case it is the guest WC radiator thermostat. It is important to select the correct connection partner channel, for the window sensor this is channel 3 (HM-CC-RT-DN Ch.: 3) NEQ*******:3 connection partner window sensor.
In step 3/3 the link is then finally created with the button “Create and edit”. Surely at this point a note “The transfer of data to the device could not be done properly” appears again, because the battery operated Window Sensor does not transfer data constantly and therefore appears out of range. But the transmission can easily be initiated by pressing the key of the window sensor.
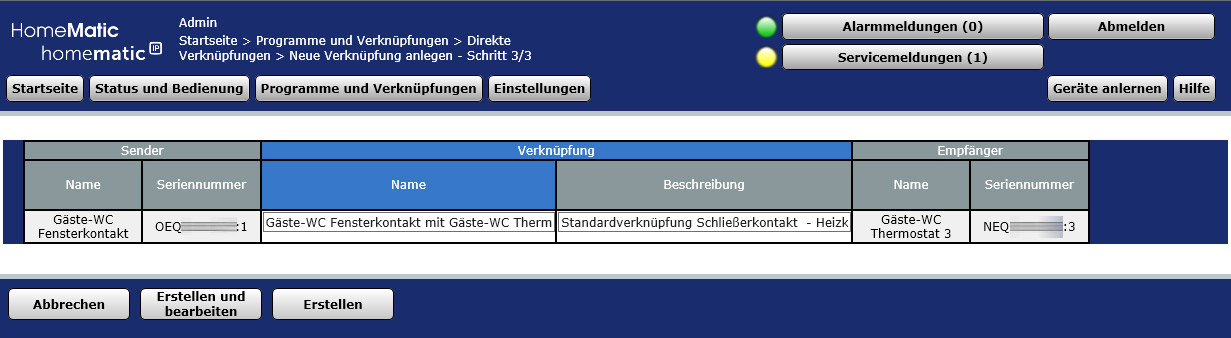
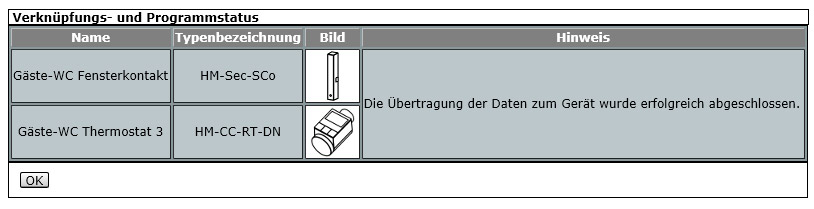
Now the transfer to the device or more precisely to the two devices has been successfully completed and the link has been created.
Check and adjust direct window sensor link …
In the following profile settings, which can be accessed at any time via the “Direct Links” menu by clicking “Edit”, we can rename the link, set the desired setback temperature and actually test the link using the receiver profile.
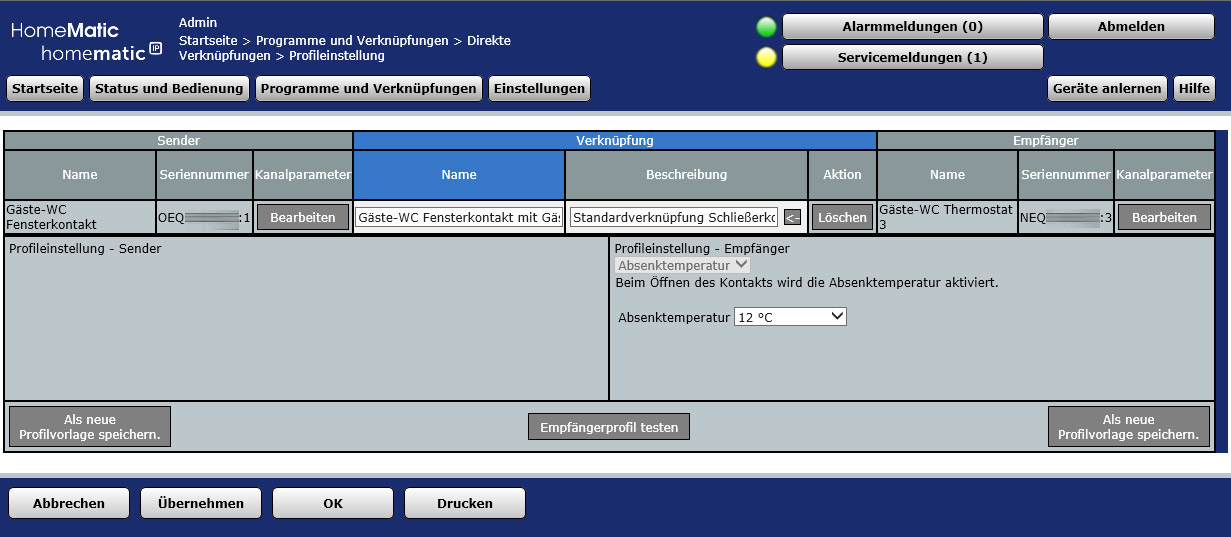
We deliberately write “actually” because “Test recipient profile” will prompt the error message “The profile could not be triggered. Please make sure that the device is within radio range and active”. However, this is normal for radiator thermostats, because the HM-CC-RT-DN radiator thermostat receiver channel WINDOW_SWITCH_RECEIVER has no data point. But that shouldn’t bother us further, because a short opening of the window followed by a look at the radiator thermostat shows just this 12°C. Testing the transmitter profile is not possible anyway. By the way, you could specify any setback temperature. We decided to use 12°C, because this temperature is not reached even after a longer ventilation and therefore no heating is done with the window open.
Now nothing stands to the energy saving and above all heating cost saving in the way!
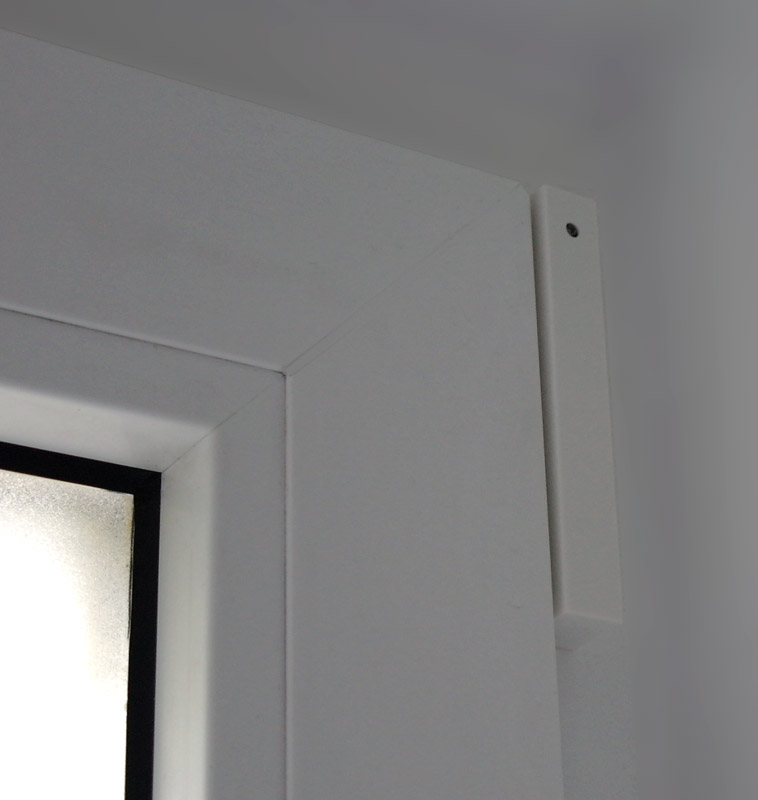
Now we come to the window sensor programming, which is of course also possible with the Homematic wireless door/window sensor optical HM-Sec-SCo.
Create Window Sensor Program …
Programs can be used to solve complex tasks in the Homematic CCU2 or Homematic CCU3 control center and to conveniently combine several actuators and sensors. The CCU2 control unit does not even require great programming skills, as the desired tasks are simply selected via a graphical user interface.
We have already created a program in the last Homematic OLED Display Programming Guide, which allows you to easily recognize open windows and doors at the push of a button and see whether all shutters or awnings are extended or retracted. Besides with a longer keystroke upward all roll stores in the house were driven up and with a longer keystroke downward all roll stores in the entire object were driven down, but that is here in the guidance to the window sensor first not so interesting. Who would like, can read the complete Homematic OLED status display programming guide, because we show today in the following programming tutorial only an excerpt for programming.
Create Homematic system variable …
If you want, you can create system variables for all possible states (such as “windows and doors closed”), which can then be conveniently queried. How this works exactly, we recently explained in the Homematic E-Paper Status Displays Programming Guide.
In the following tutorial we take the more direct way, without any system variable.
Show on a display with a short keystroke whether all windows are closed …
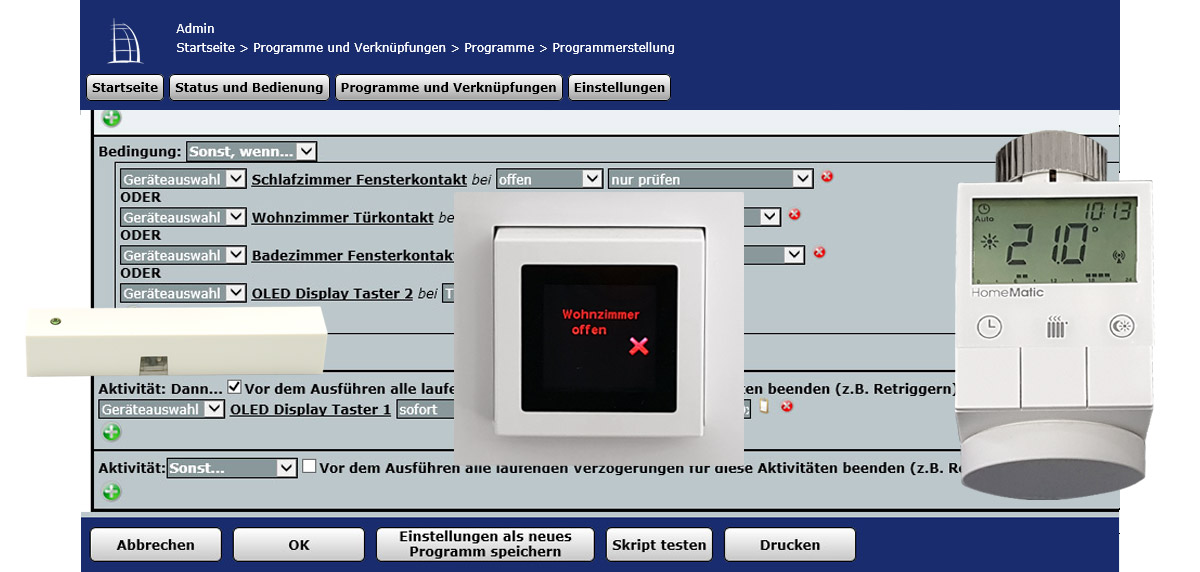
For programming select Programs and connections -> Programs -> New in the CCU2 user interface and give it a meaningful name like “Status Display top short window” and if necessary a description like “Status Display button top short window check”. After that you choose at the condition: If … as device selection select the desired Window Sensor which should be queried. Here you can easily check all door- and window sensors when closed and link them with AND. In addition, you can also link “device selection” OLED display button 2 (yes, top is 2 and bottom is 1) with “short key press” also with AND. The best way is to link them at the first point and not at the end as in this example. At the activity: Then … select “device selection” -> an OLED display button channel (we had called it in the Homematic status displays teach-in guide OLED display 3), select immediately, channel action.
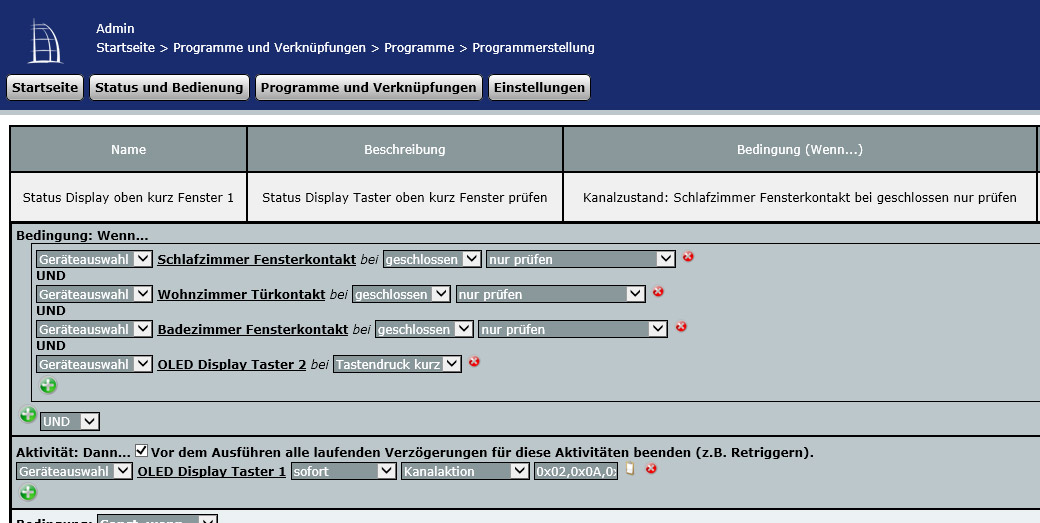
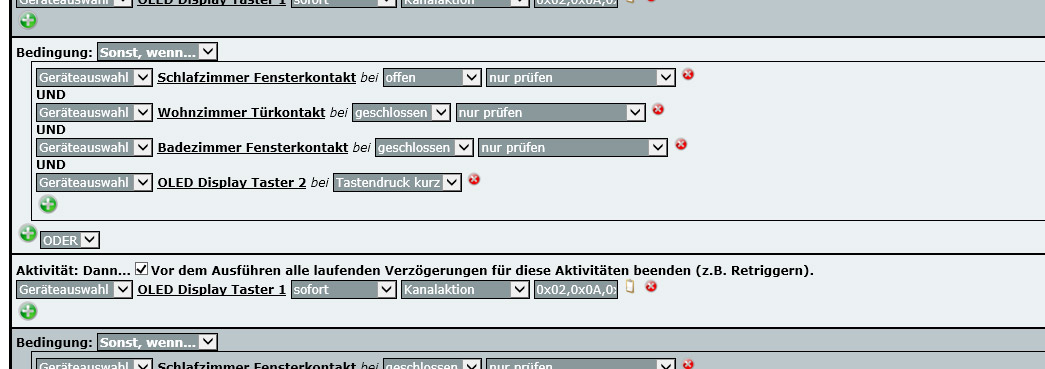
Now you could simply use it as a control: Otherwise … check all window sensors and door contacts at “open”. But we also want to check the status of every single window. We can do this by selecting the device and pressing the key shortly for the display button 2 and linking it with AND, …
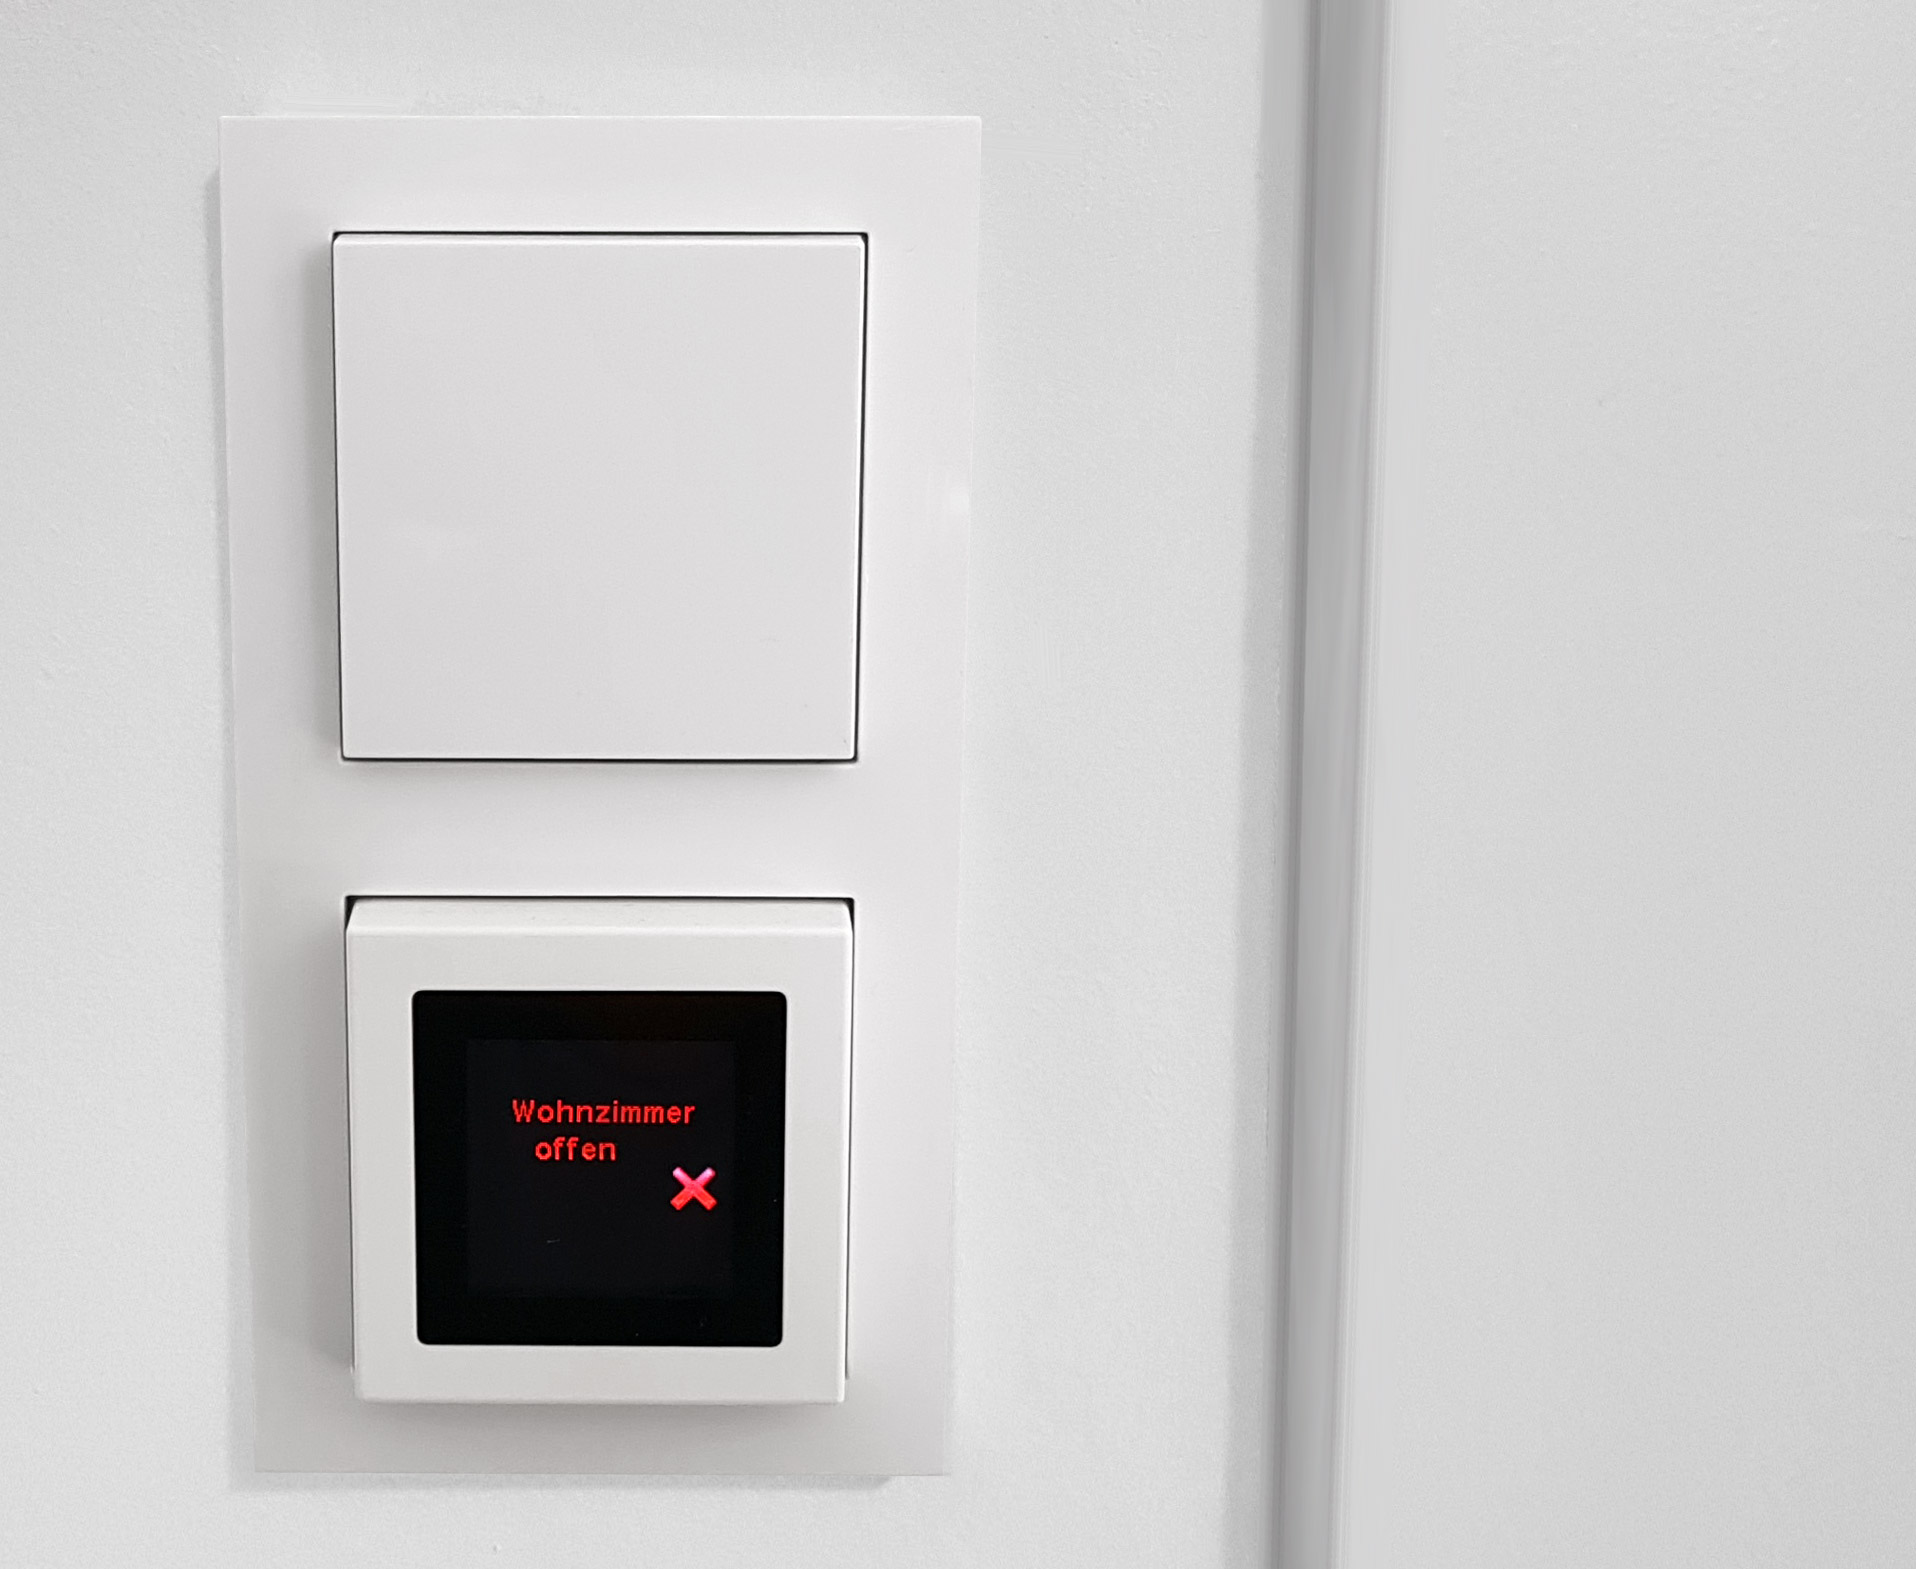
For example, the “Living room open” message on the Homematic color display.
After you have done this for all window sensors, create another one, if … instruction, where we again enter the display keystroke briefly and all window/door contacts. But this time “open” is linked with “OR”! So if bedroom window open OR living room door open OR bathroom window open, etc. …
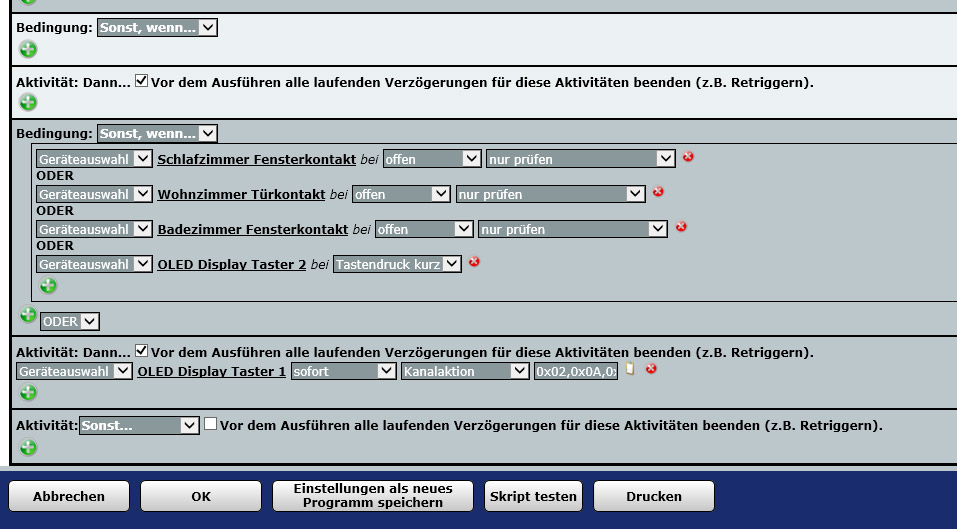
But you can see already from this small programming that the effort is relatively large if you have many window sensors or door contacts. It becomes even more complex if you want to add more window sensors later on, because in the worst case you would have to extend each program for each display with more AND links.
That’s why we recommend to use the system variable for such tasks, because you can easily query and extend it with any program at any time. And the great thing about the system variable is, that you don’t have to build these queries in every program, but access the system variables you created before. Another advantage is that system variables can also be retrieved easily via app! As already described in the Homematic CCU2 Test, you can query, operate and display the Homematic devices and system variables via third-party programs or apps like TinyMatic. If you want you can also get a push message or mail, if the windows are open for more than half an hour or during the night, etc. … the possibilities are almost unlimited.
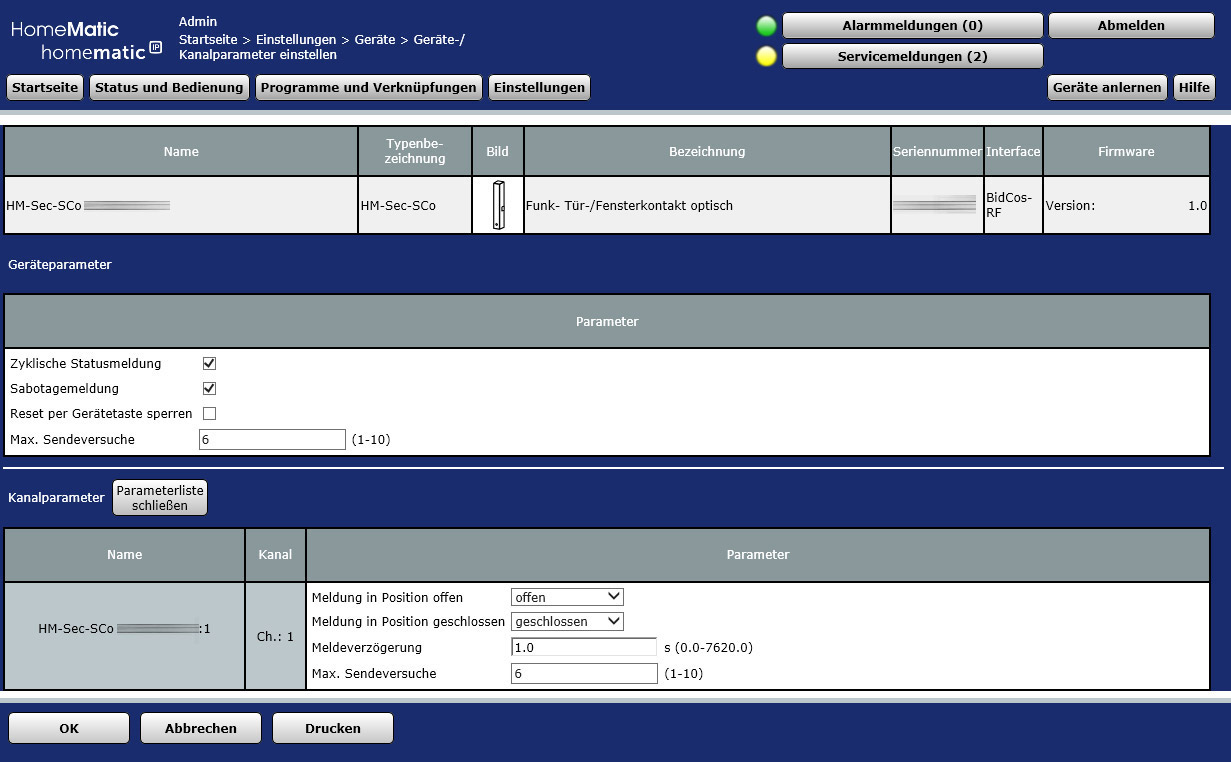
Of course you can also program scripts for the optical Homematic wireless window sensor HM-Sec-SCo and the magnetic wireless door/window sensor HM-Sec-SC-2. The channel type available for script programming is SHUTTER_CONTACT with the parameters STATE, ERROR, LOWBAT and INSTALL_TEST.
Note on the Homematic programs …
Once again a short note to refresh from the Homematic Thermostat Program Guide: Programs without “if” condition must be deactivated after creation, otherwise they will be executed unintentionally, e.g. when the central unit is restarted! But if you want to see and use programs in a smartphone app, for example, check the checkboxes “operable” and “visible”.
The program shown above for the operation via the status display buttons via the “If” condition should be activated and does not require any operation via an iOS or Android app. Whether you make these programs visible and operable is up to you. Depending on the number of programs it can get confusing and it is recommended to only show the programs you really want to use.
Tip: If you want to sort the Homematic programs alphabetically, just go to Status and Operation -> Programs in the CCU2 control panel and the programs will be sorted alphabetically in the next view. By the way, with the latest Homematic CCU2 Firmware Update the programs are sorted automatically.
We hope that this little guide will help you and if you have further questions we will help you as usual in the Homematic Forum.
Read the Homematic Window Sensor review …
Discuss in our forum and share experiences about the programming guide …
Here you can buy the Homematic Window Sensor as kit at a reasonable price. *Ad