

In this small Homematic OLED Status Display Teaching Tutorial for beginners we show today on Funkyhome.de how to connect the recently tested Homematic HM-Dis-WM55 OLED Status Display to the Homematic control unit and how to set up the wireless OLED Status Display.
In the Homematic Status Displays Programming Guide we will then show how to program the colored display, for example to query the status of windows and shutters. We will use the program to let the buttons query the values with a short press and with a long press to raise or lower all the shutters in the house. There are of course many more possible applications, but more about this later.
OLED status display to the Homematic CCU2 …
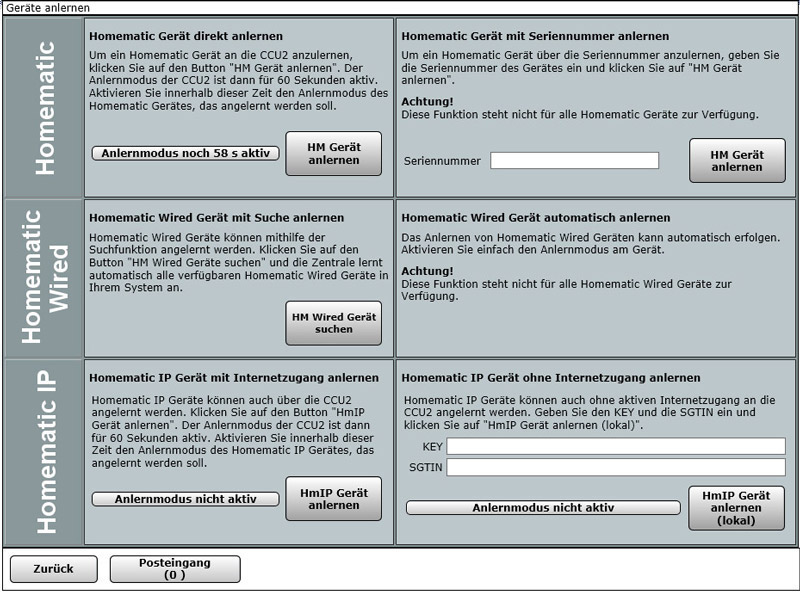
To teach the OLED status display to the CCU2, select the “Teach devices” button in the upper right-hand area after calling up the Homematic CCU2 interface and start the teach mode with the Teach HM devices button. Now the central unit waits for 60 seconds for new devices, which you want to connect to the central unit by pressing the Config button on the respective device. The Config button can be found on the back of the display.
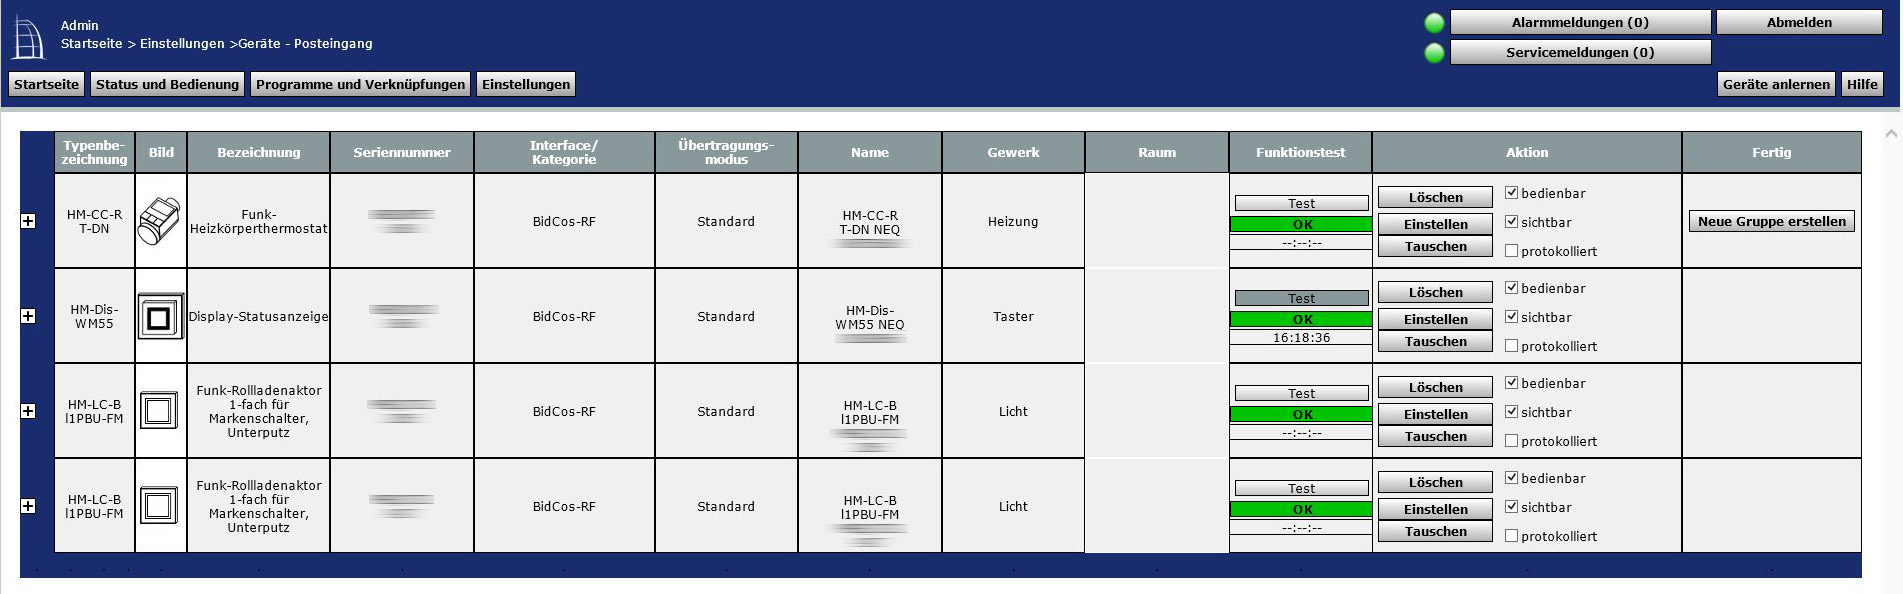
Now click on the inbox, where the previously learned devices can be found. So don’t be surprised if the device doesn’t appear immediately in CCU2, because it must be confirmed first! This is done at this point with all the devices that have been learned and you can then rename them, assign them, program dependencies and adapt them. Here you can see a Homematic radiator thermostat above, below that the Homematic OLED Status Display and then two Shutter Actuators HM-LC-BI1PBU-FM from the previous Homematic Shutter Actuator Review.
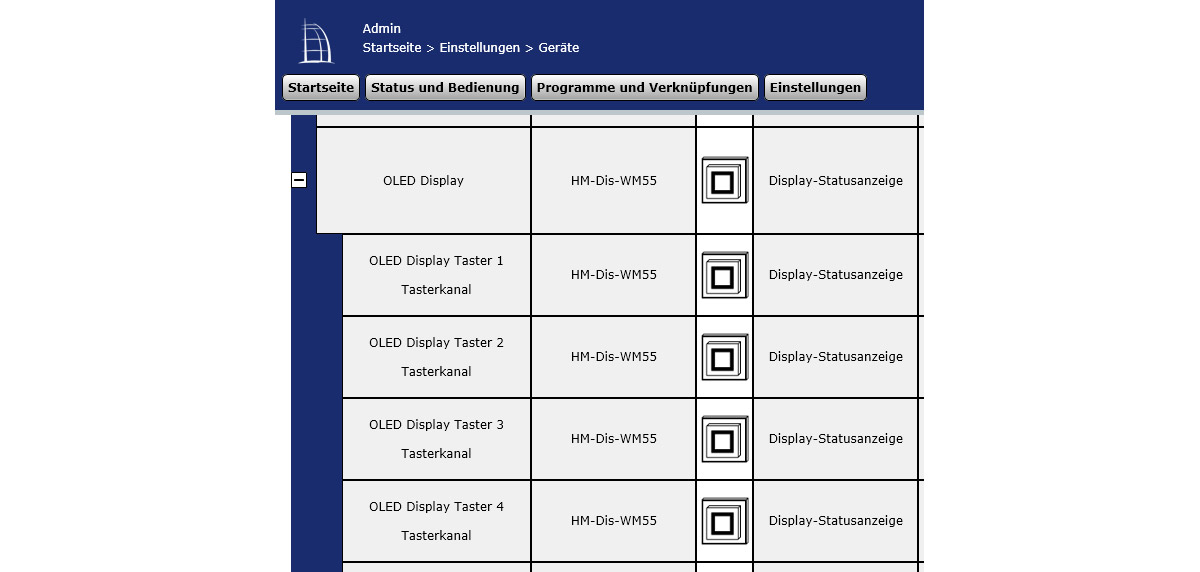
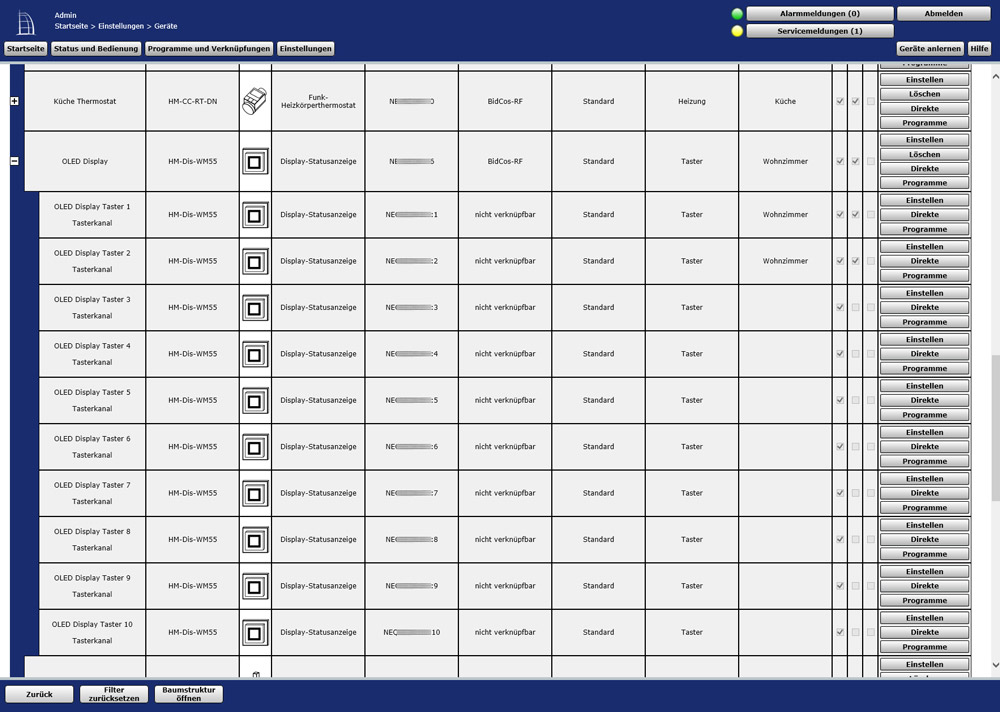
The confirmed Homematic Status Display can now be found in the Homematic CCU3 central unit under Settings -> Devices -> Set, where you can open the different channels to configure them. We have renamed the OLED Display for testing as OLED Display, the buttons as OLED Display Button 1/2 and assigned as room to the living room. The clear naming is very helpful later, e.g. during programming and in the iOS or Android smartphone or tablet app and should be done directly.
Now we can make some basic settings via “Set” or later via Settings -> Devices -> Setup. Unfortunately, there is (still?) not (yet?) like with the Homematic HM-Dis-EP-WM55 E-Paper Status Display a choice whether to operate the color display with a power supply or with batteries. This means that there is no option to make the Homematic colour display light up continuously, but you only have the choice of whether the Homematic colour display should light up for 1 second up to 99 seconds after pressing the button. What a pity, because many people would certainly wish for a continuously lit Homematic OLED display.
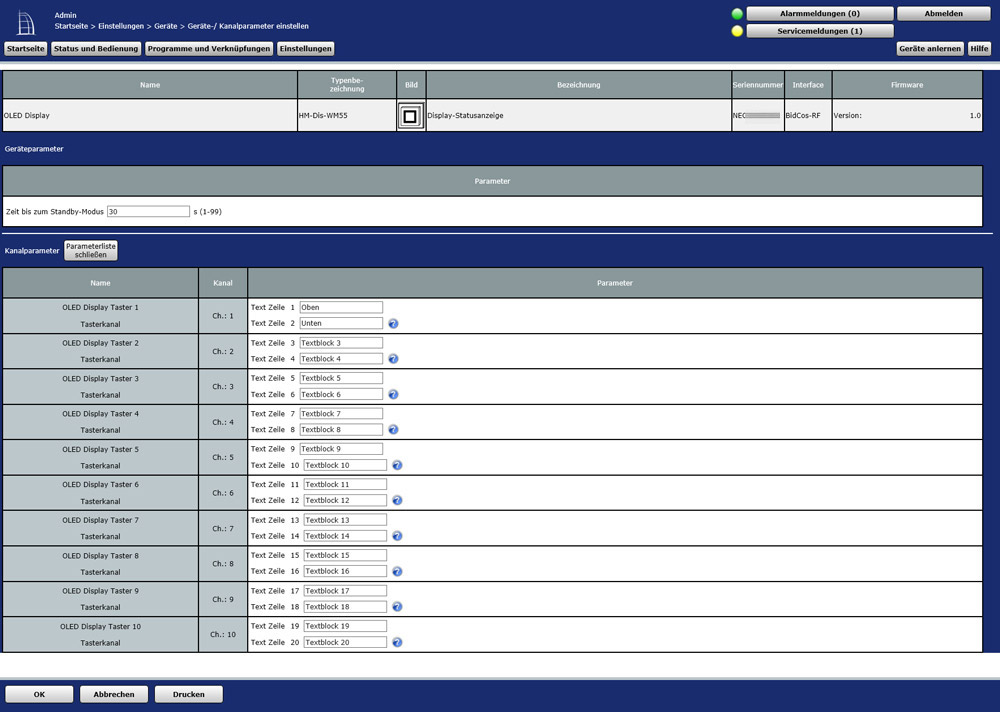
Further down you will find a parameter list via the corresponding button, where you can enter different texts (max. 12 characters per line). The ten text blocks of 2 lines each can be entered optionally and allow access to frequently used text blocks such as “shutter” “door”, “window”, “open”, “closed”, “bathroom”, etc., thus reducing, among other things, data traffic.

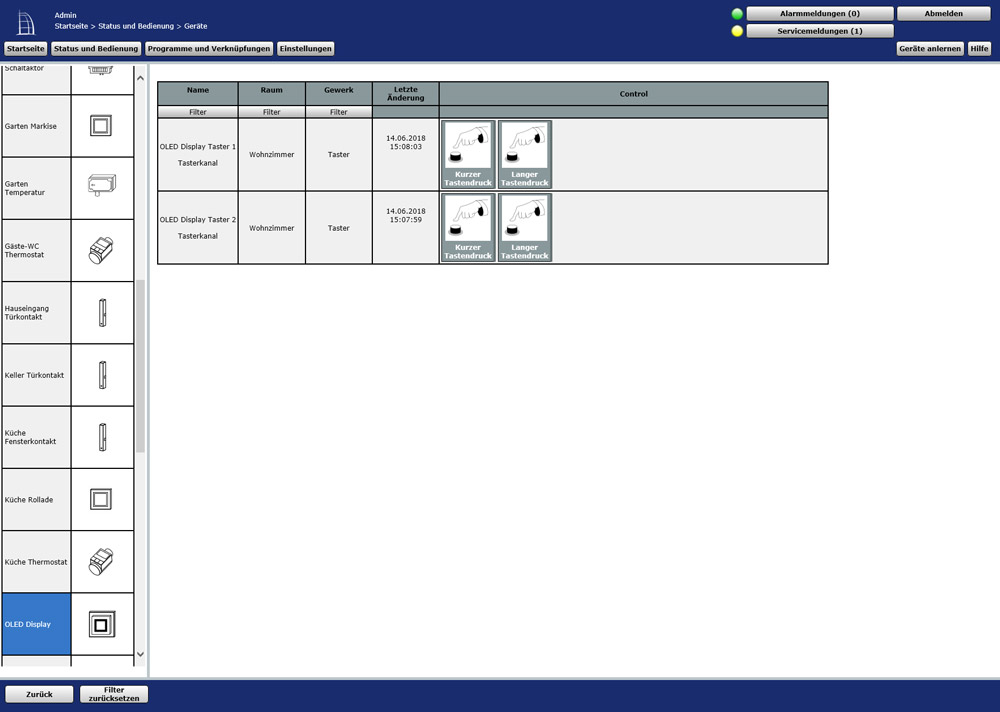
By the way, in the CCU 2 Central Unit you will also find the corresponding buttons under Status and Operation -> Devices: Short key press up, long key press up, short key press down and long key press down, i.e. a total of 4 switching options with which you can do a lot.
In the Homematic Status Display guide we now show with a few examples how to program the Homematic Display and how to program the display buttons.
We hope that this little tutorial helped and if you have any questions we will of course help you in our Homematic Forum.
Homematic OLED Status Display Test …
Discuss in our forum and share experiences about the OLED Display Teaching Guide …
Here you can buy the Homematic OLED Status Display at a reasonable price. *Ad