
In the new Shelly Shelly BLU Door/Window and Shelly H&T Gen3 instructions on Funkyhome.de, we show you how to set up the Shelly BLU and H&T Gen3, update the Shelly BLU firmware, set up a window alarm, switch off the radiator when ventilating and switch ventilation on and off if the humidity is too high, for example.

Here you can buy Shelly products. *Ad
Directly to the Shelly BLU manual and Shelly H&T Gen3 guide …
Shelly BLU Door/Window setup
Shelly BLU Door/Window Firmware Update
Shelly H&T Gen3 setup
Shelly devices in practice
Window alarm with the Shelly BLU Door/Window
Heating off when airing
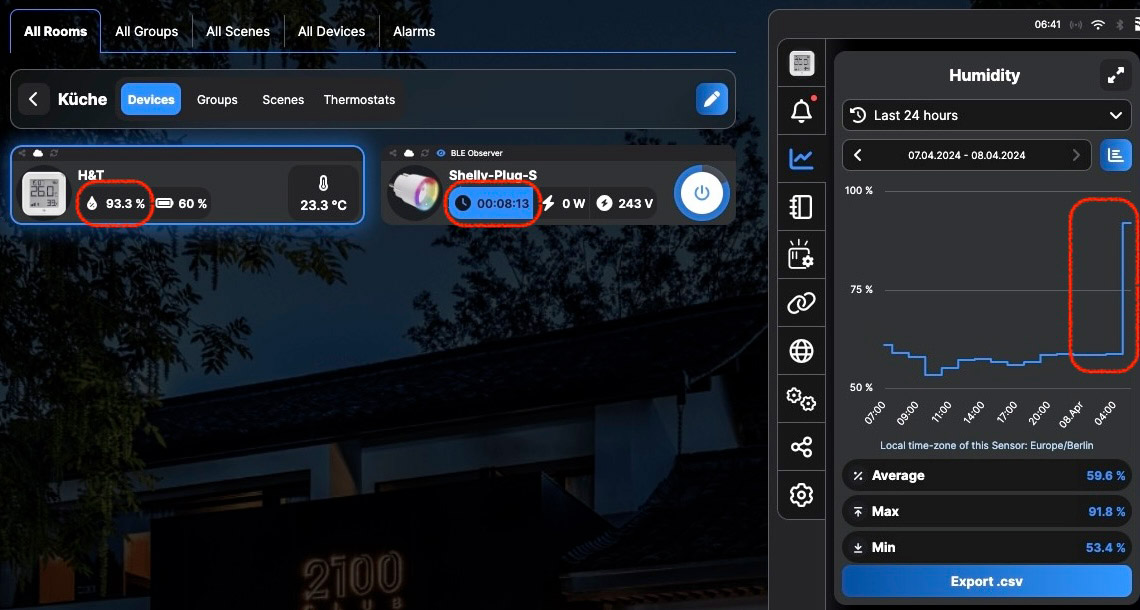
Kitchen fan for high humidity
More options
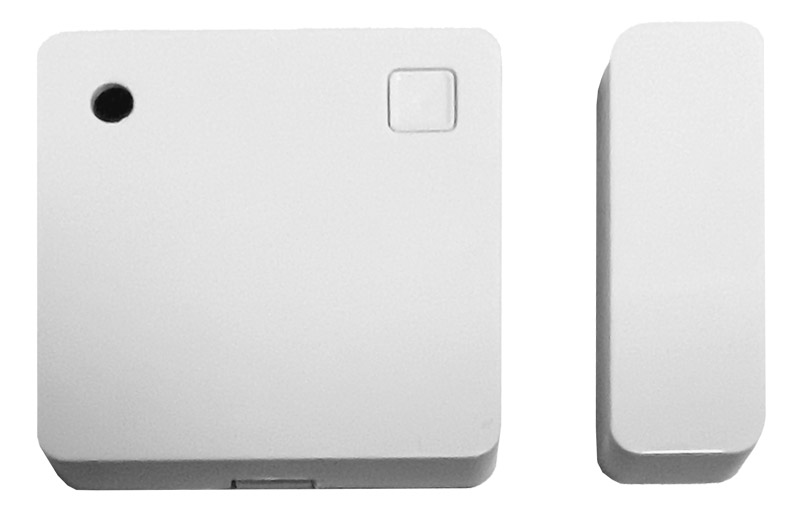
Shelly BLU Door/Window setup …
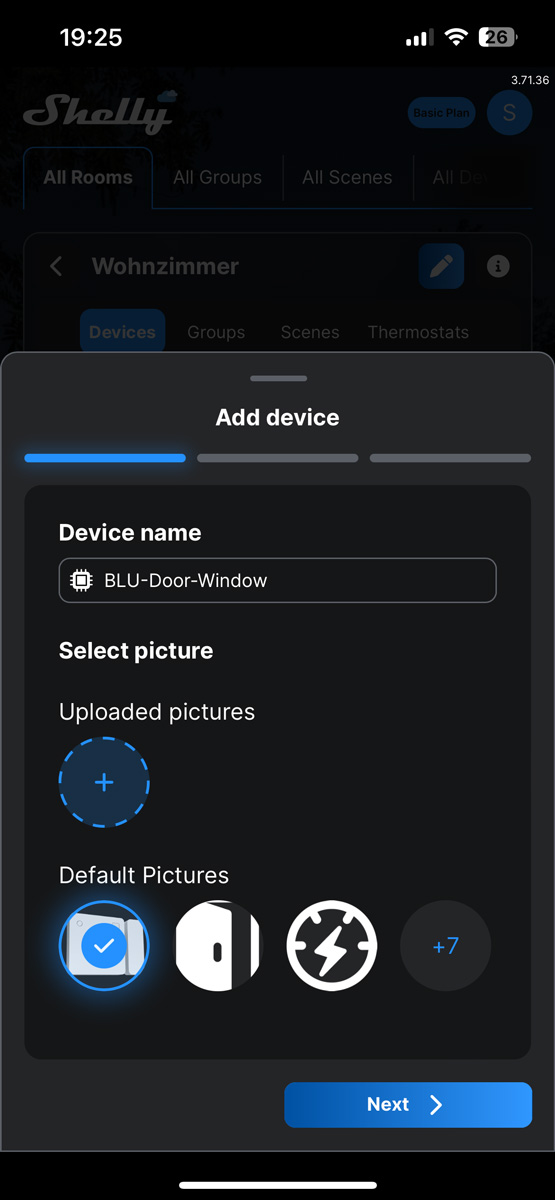
Setting up the BLU Door/Window Sensor is quite simple via the app. It is important that Bluetooth connections are allowed for the app. After pressing the small button on the sensor, the BLU should be recognized as a new device by the app and can then be added.
In addition, another device from the Shelly Plus or Pro series should already be registered in the account, which can then be set up as a gateway for cloud communication. As the BLU Door/Window does not have its own WLAN connection, it is dependent on another device to connect to the outside world.
It is practical that several devices can be used as a gateway if they are within range. This reduces the likelihood of a signal from the sensor being overlooked by one of the other devices.
Shelly BLU Firmware Update …
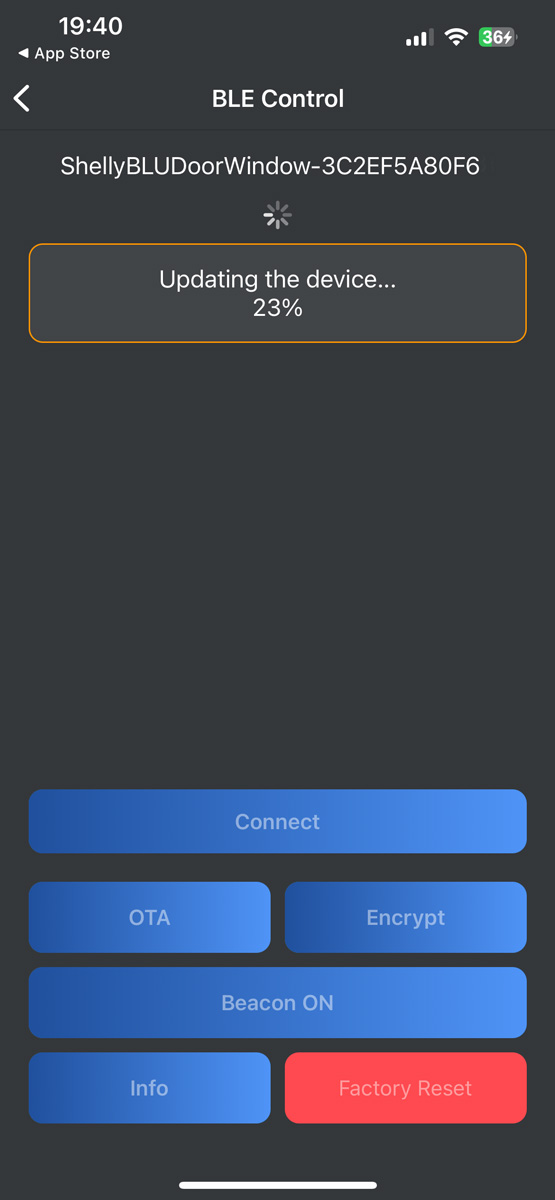
Updating the firmware for Shelly BLU sensors such as the Shelly BLU Door/Window is also slightly different.
As there is no Wi-Fi connection, the device cannot download new firmware itself. The normal Shelly app does not help here either. An additional app called Shelly BLE control (available for Android and iOS) helps here. This app also needs permission to use Bluetooth on the mobile device. It then finds the sensor and connects to it after a long press on the small button on the Shelly BLU Door/Window.
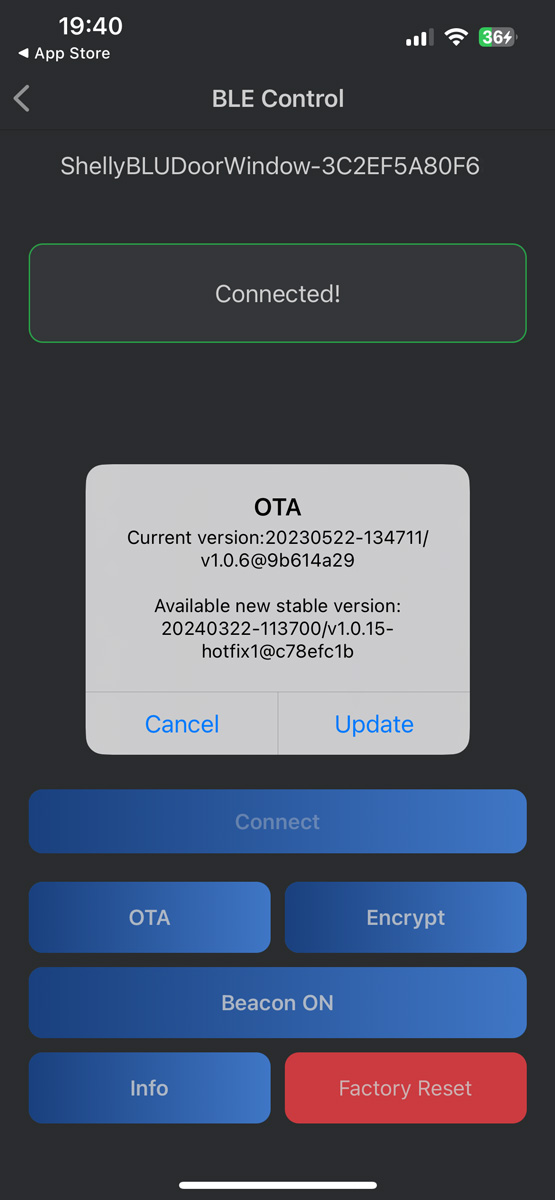
If new firmware is available, an OTA (Over The Air) update is offered and the firmware is transferred to the sensor.
In our case, however, the battery level dropped from 100% to 50%. However, this could also be because the battery was already active in the device and therefore no longer had the full 100%. In this case, Shelly could use a small strip to extend the runtime of the first battery by pulling it out between the button cell and one of the battery contacts before first use.
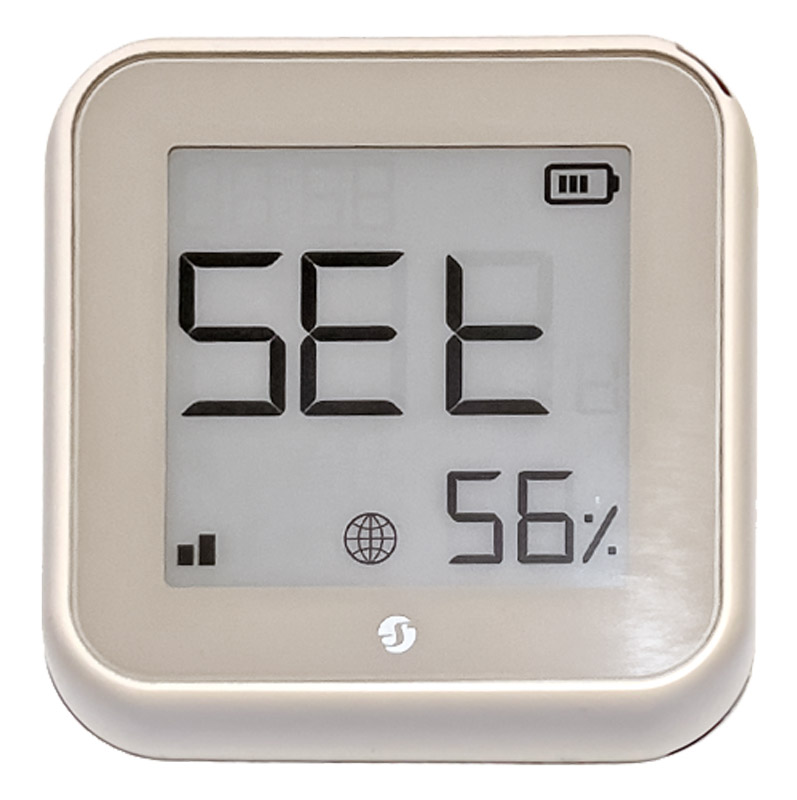
Shelly H&T Gen3 einrichten …
The Shelly H&T Gen3 is also quickly linked to the app. To do this, you need to remove the cover on the back and press the reset button once. The device then goes into setup mode and can be recognized by the app. It is then added like any other device and assigned to a room.
As you have to remove the cover to insert the batteries anyway, it makes sense to pair them with the app at the same time. If you don’t have enough time to pair such battery-operated Shelly devices, you can supply them with power via the USB port (see Shelly Button Test). The device then does not go into sleep mode and maintains continuous communication.
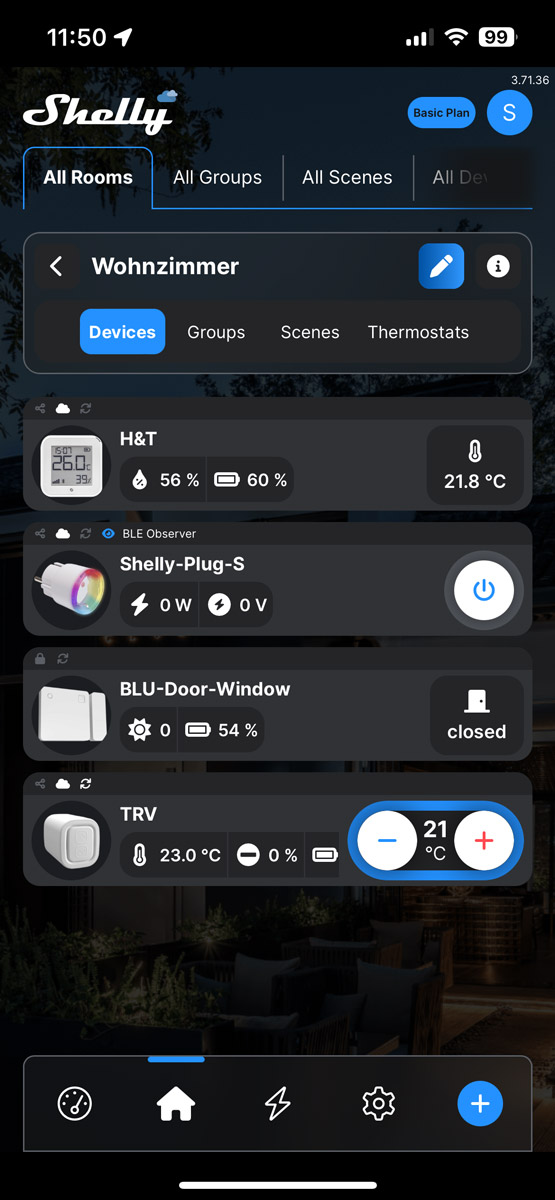
Shelly devices in practice …
We also used a Shelly Plug-S Plus socket and the Shelly TRV heating thermostat for our test and have already integrated them into the app.
We can now start testing a few things. First, we set up an alarm door and window sensor. This will send us active messages when the window is opened. Unlike the previous door and window sensor, there no longer seems to be a vibration alarm. Only the magnetic switch triggers an alarm. And this is the only time the data from the tilt sensor is updated. This is not a bad thing, but should be kept in mind when creating automations.
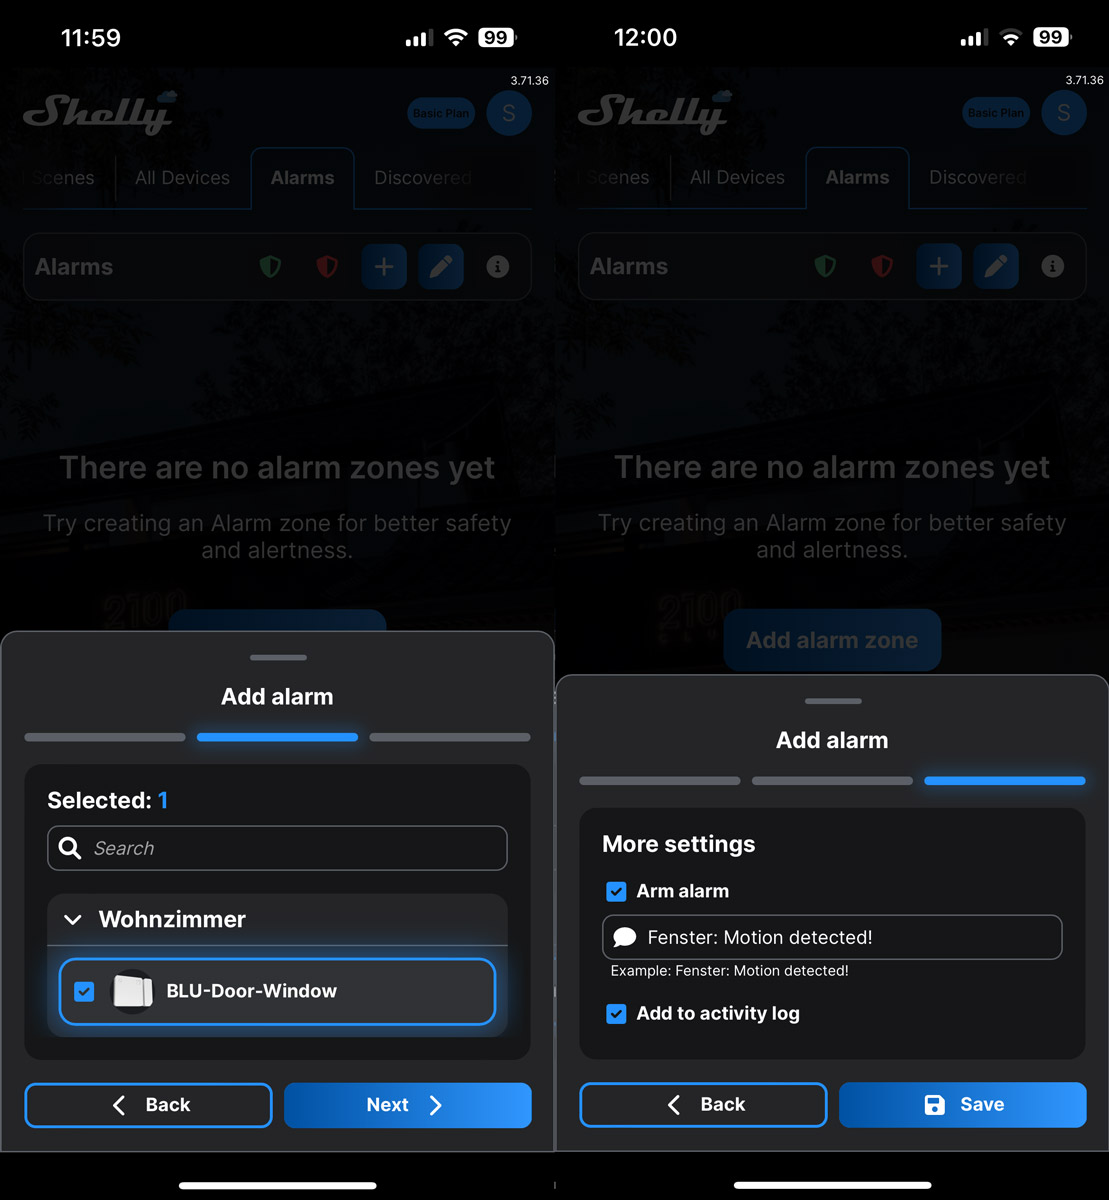
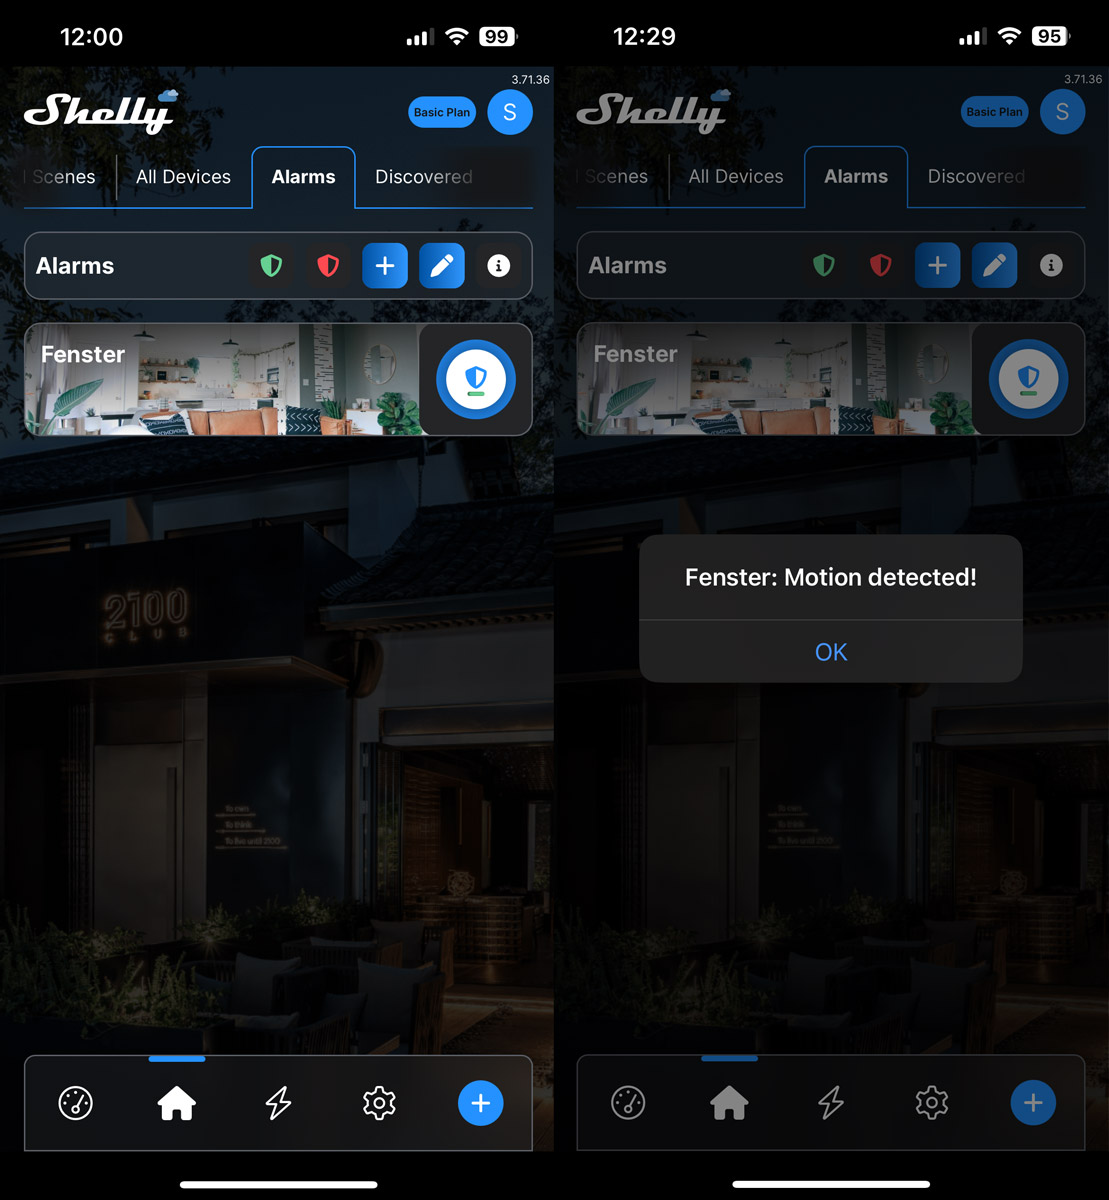
Window alarm with the Shelly BLU Door/Window …
What is immediately noticeable is that there is no perceived delay in the message when the sensor moves away from the magnet (e.g. when opening a window or door or the motorhome door). Although the signal is first sent via Bluetooth to the Shelly Plug-S Plus socket and this is then sent to the Shelly Cloud. We immediately receive a notification both by email and in the app.
Of course, we also want to react to the window opening with an automation system without an alarm. For this reason, set alarms can be switched off as a group or individually.
Heating off when ventilating …
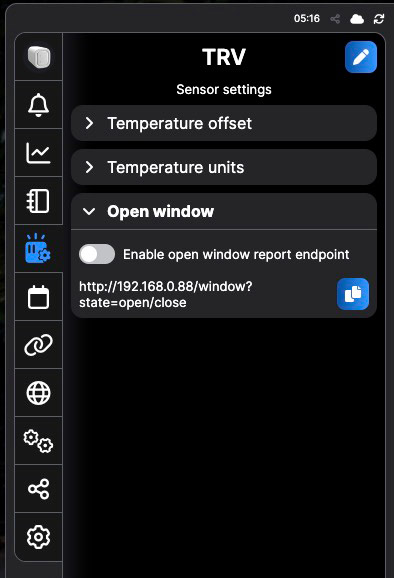
A typical application of a window sensor and a thermostat is when ventilating a room. If a window is opened to ventilate, the thermostat should set the heating regardless of the set target temperature. Previously, you could use the “Enable open window report endpoint” function on the TRV thermostat and enter the IP address of the window sensor there. Unfortunately, this no longer works with the new BLU Door/Window, as it only speaks Bluetooth.
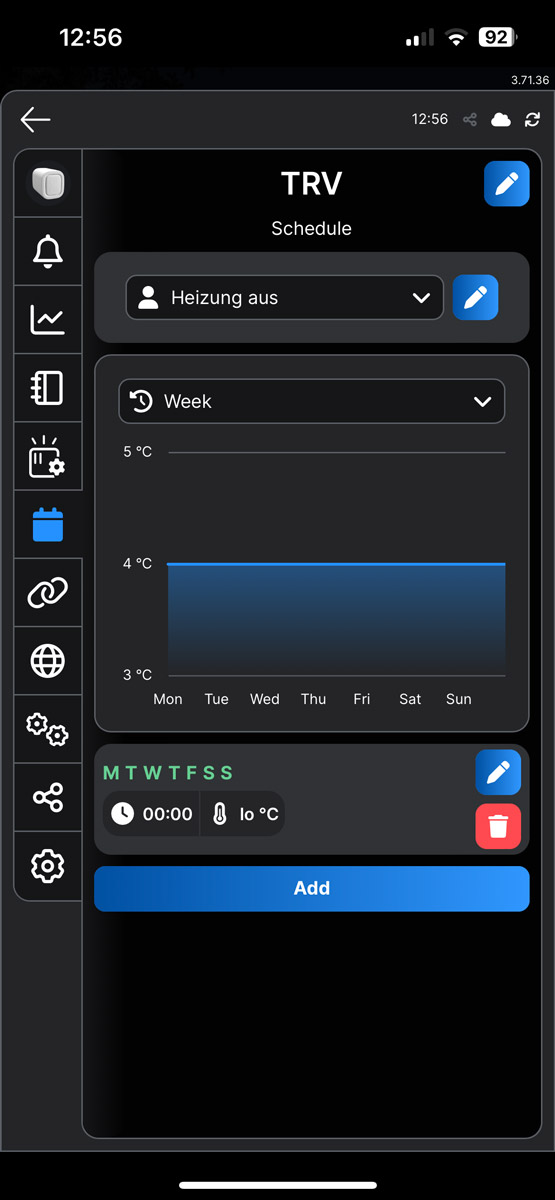
This can be remedied with a small scene and an additional schedule. To do this, we rename one of the TRV schedules to “Heating off” and simply set “close” for all days of the week and all times. It is important that we do not use the normal schedule of our temperature control for this, but an unused schedule in the device, e.g. the “Holiday” schedule is suitable here.
We can then create a new scene that uses the window sensor with the condition “Window open” as the trigger. As an action, we then set the TRV schedule to “Heating off”. The Shelly TRV then switches to the new schedule and deactivates the heating in our case.
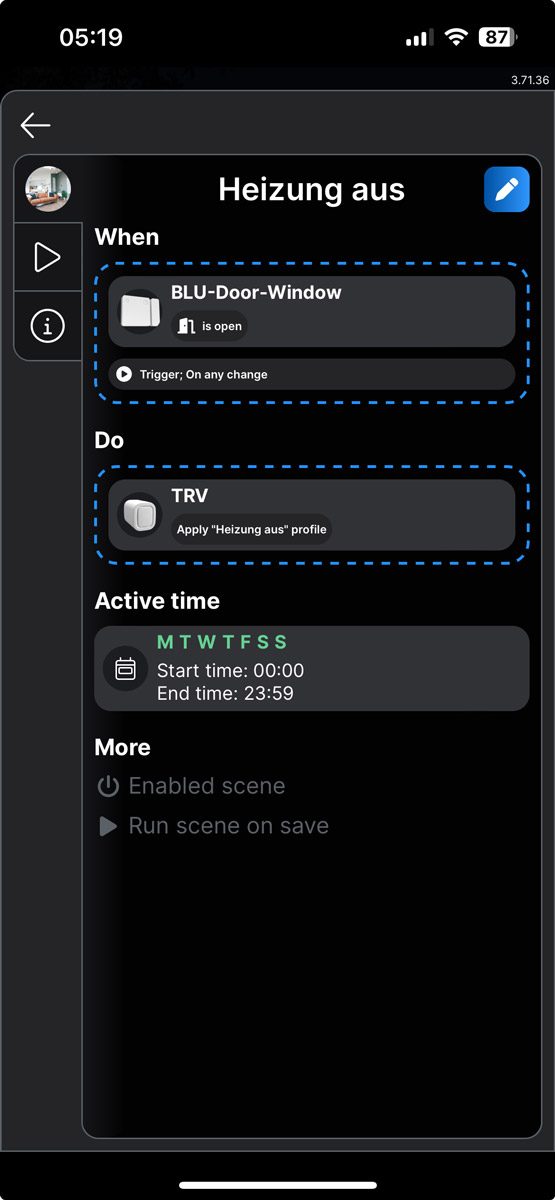
Of course, we also want to switch our heating back on when the window is closed again. To do this, we create a second scene. The only difference is that in this case the condition is “Window closed” and the normal TRV schedule is set as the action.
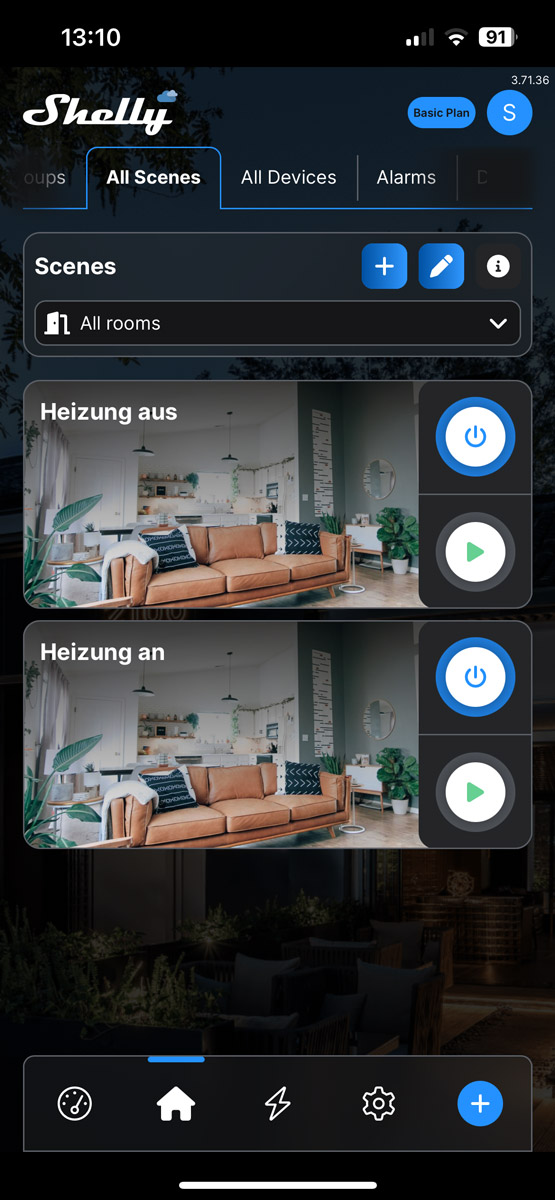
We can see whether the whole thing is working by looking at the temperature currently set for the TRV in the app. If we open the window, 4°C is displayed after a short time and our scene is active. If we close the window again, the target temperature returns to the value set in the normal schedule after a short time.
Kitchen fan for high humidity …
We can also use the Shelly H&T for automation. In this example, a fan is to be activated depending on the humidity in the room. This is helpful in the kitchen when cooking or in the bathroom after showering, for example.
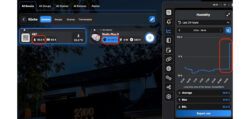
To do this, we have moved the Shelly H&T and the Shelly Plug-S Plus socket as devices in the app to the “Kitchen” room. This has no effect on the function, but it is clearer. Incidentally, it is much easier to make such adjustments in the Shelly web app (control.shelly.cloud) than in the app on the smartphone or tablet. The functions are identical, but it is a little easier on a large browser. Small adjustments, e.g. for the values, can also be easily made in the mobile app. First, we create a new scene for the kitchen room.
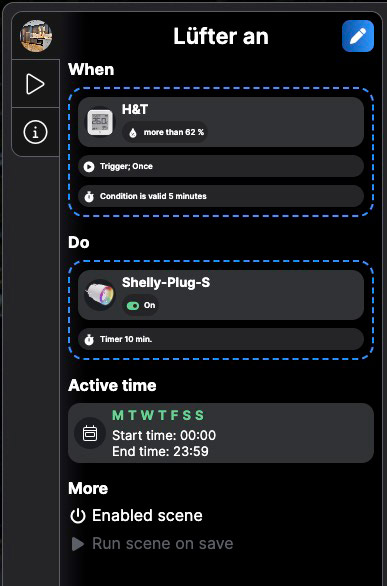
We use the “Shelly H&T” device and the “Humidity” sensor value as the trigger. So that our fan is not constantly switched on and off with every small change, we also use the “Value is greater than 62% for 5 minutes” function. This means that the scene is only triggered if the value is above 62% humidity for longer than 5 minutes. As an action, we use the Shelly Plug-S (here assuming that our kitchen fan is connected to it). Here too, we don’t just switch the device on, we use the “switch on for X minutes” function and set the time to 10 minutes. This means that we switch the fan on for 10 minutes if the humidity is above 62% for 5 minutes.
The picture of the room overview shows very nicely what happens when the scene is triggered. We can see the humidity in the room and the Shelly Plug-S Plus not only shows that it is switched on, but also that the timer is running backwards.
More options …
The two examples in our small Shelly BLU Door/Window and H&T Gen3 guide have already shown the possibilities for automating processes by combining various Shelly components. For example, we could also automatically switch on certain lights in the house when the front door is opened. The window sensor could also report when the letterbox lid is opened and thus indicate when mail has arrived. It could certainly also be modified slightly to use it as a doorbell detector (see Homematic wireless doorbell detector instructions).
Continue to the Shelly installation instructions …
Read the Shelly BLU Door/Window and Shelly H&T Gen3 review …
Discuss in our forum and share experiences about the Shelly BLU Instructions …