
Layout, design and features …
Before we can use the Homematic Display kit, we have to finish soldering and assembling some components. How to solder, we have explained in numerous soldering instructions on OCinside.de
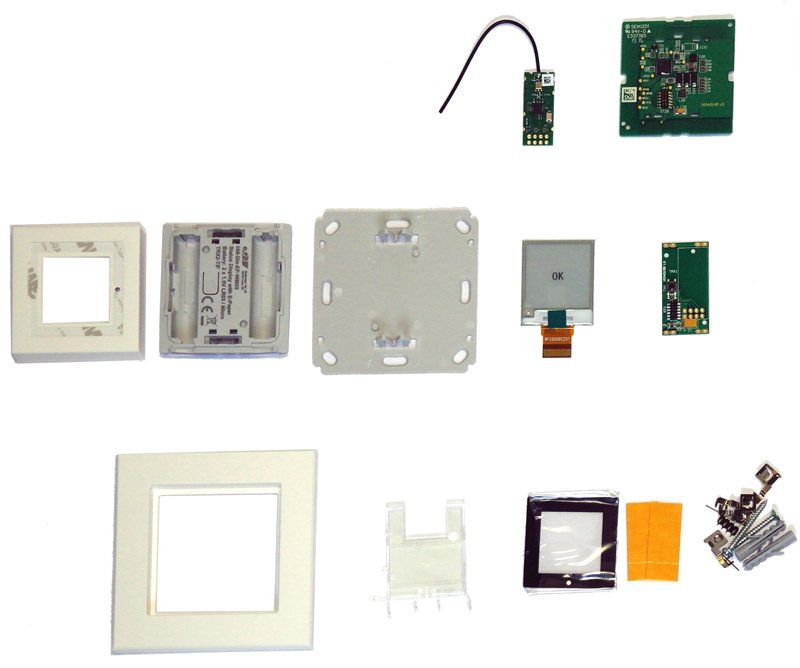
In contrast to the Homematic CCU2 kit and Homematic radiator thermostat kit this time a little more soldering is required. How to do this exactly is described in detail in the enclosed Homematic building instructions.
Since this is a battery operated device and the assembly is possible with basic soldering knowledge, the kit saves you a lot of money in contrast to the assembled product.
All in all it takes about 20-30 minutes to build the first E-Paper Display kite and after a few kits it is of course much faster.
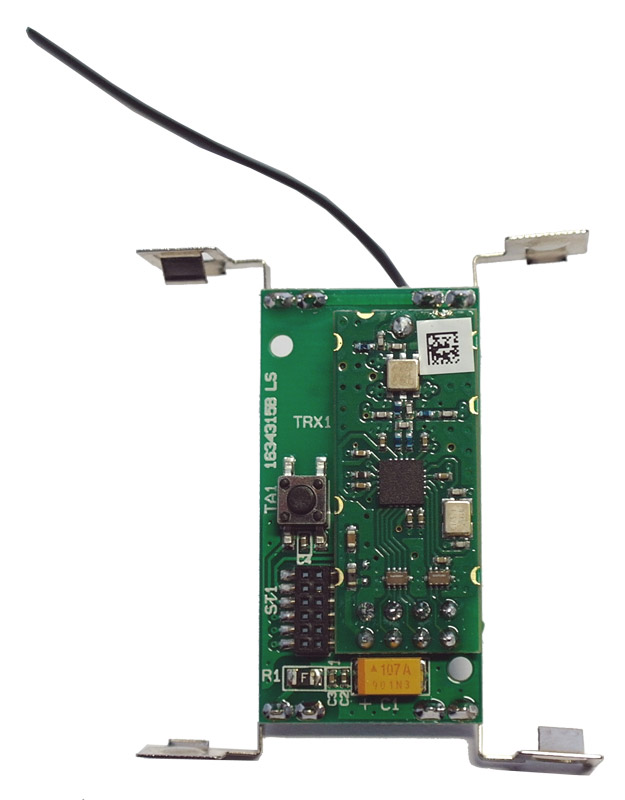
Here you can see the finished soldered circuit board with the soldered battery contacts and the soldered 868,3 MHz radio module.
Now connect the E-Paper Display with a foil conductor …
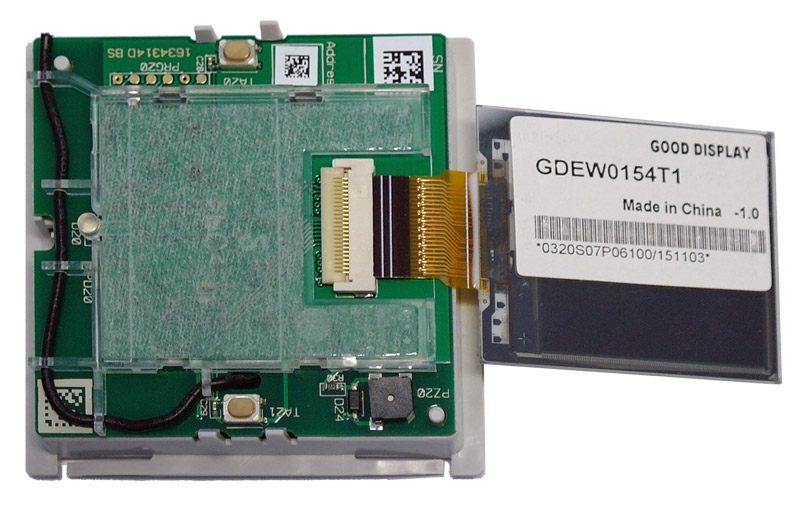
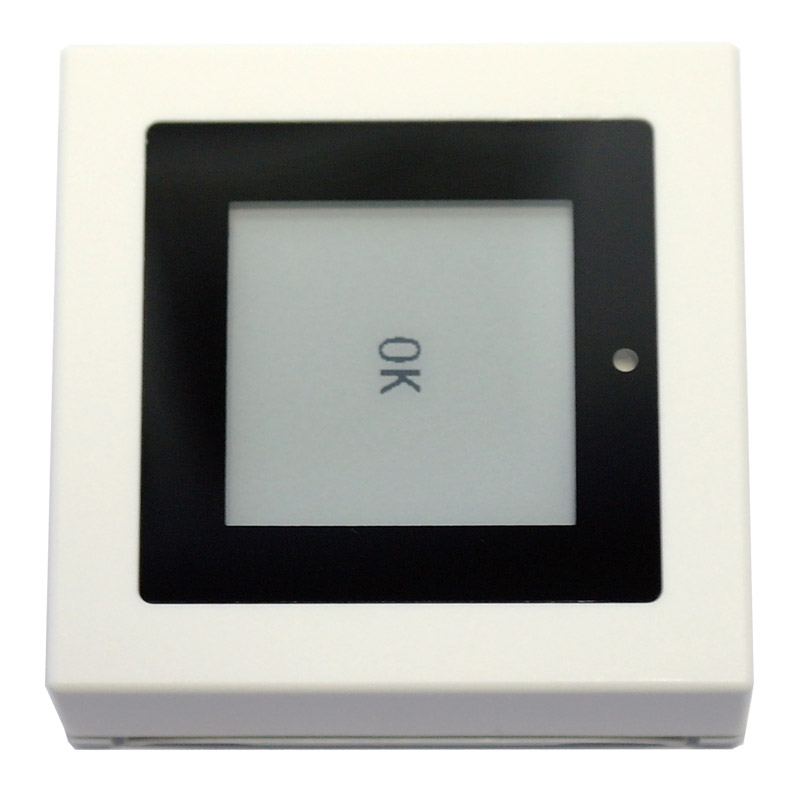
… Fold down the display and insert it into the housing. By the way, it’s right that you can see the “OK” on the side, as it’s only a test pattern that remains in the production of the E-Paper Display Test, but even more so.
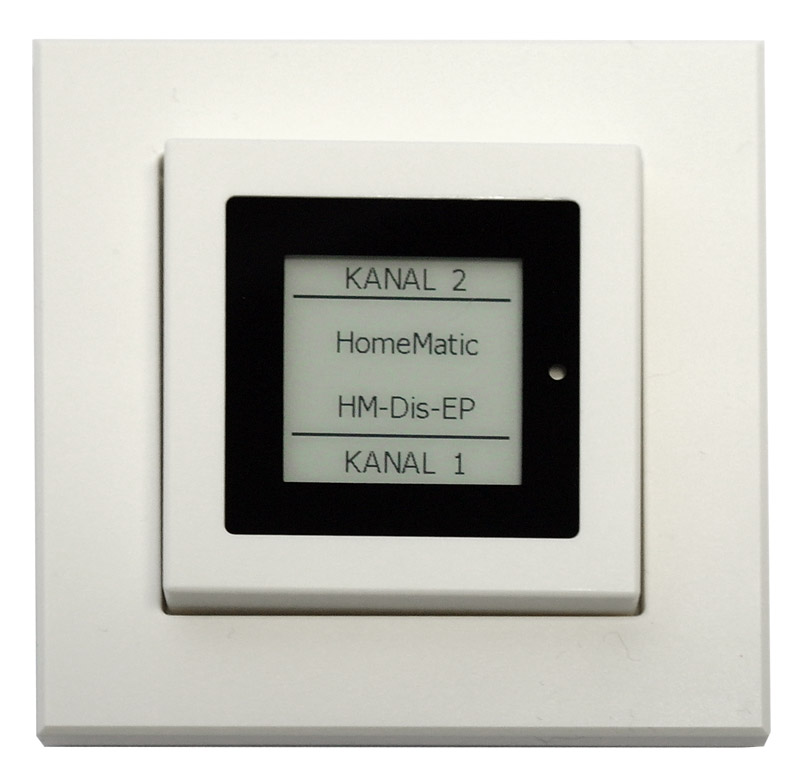
As soon as you have inserted the two AAA batteries, you’re ready to go: The Homematic E-Paper Display shows channel 2 at the top for the upper button assignment and channel 1 at the bottom for the lower button. In addition, there are 3 lines of 12 characters each plus an icon in the middle area, which serve as a free display.
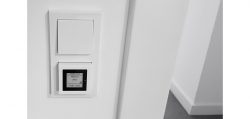
The interesting thing about this is that you don’t actually need a flush-mounted box for installation, as the display can be surface mounted. You just screw the included mounting plate to the wall and put the display and the frame on it. The included 1-slot frame doesn’t look as good as a ST55 Gira frame, so we used the Gira frame. In our case we used a 2-slot Gira frame in pure white gloss and placed the display under the light switch. Even without screws, the display fits perfectly into the frame. Of course, it can also be integrated into standard 55 mm frames from other manufacturers such as Busch-Jaeger, Gira, Merten, Berker, Jung, duwi and Kopp.

As an optional accessory, a ELV Homematic IP power supply unit *Adtable stand for battery powered devices *Ad in 55mm format (141742), with which you can place the display on a table.
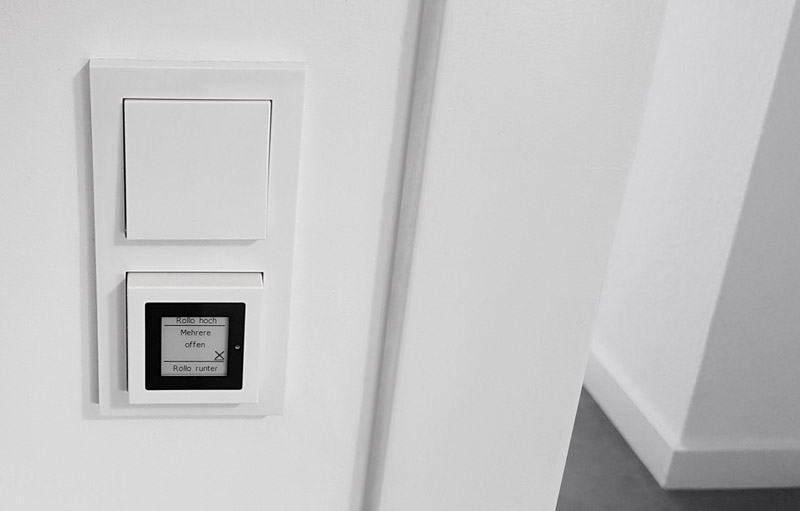
The finished e-paper display looks glossy pure white in a Gira 021229 2-gang frame, for example. A light switch can be seen at the top and we have integrated the Homematic Display at the bottom, with which you can also control the roller shutters. In our example, a long keystroke upwards raises all the shutters or a long keystroke downwards lowers all the shutters and in the middle you can see whether all the windows and doors are closed.
In our opinion you can save the 20 Euro surcharge for the assembled product this time, even if you are not a trained specialist with good soldering skills – basic knowledge is sufficient.
Let us now come to the setup of the E-Paper Display and the test of the eQ-3 E-Paper Display in practice.
Homematic E-Paper Display Practical testing …