

In the following instructions we will show especially newcomers how to create programs for the eQ-3 Window Rotary Handle Sensor so that the shutters only lower when the balcony door is really locked and you are not in the garden. We also show an example in the programming instructions of how to lock the Homematic Shutter Actuator as soon as a window or door is opened or tilted.
Create Window Rotary Handle Sensor programs …
Programs can be used in the Homematic CCU2 control unit to solve complex tasks and to combine several actuators conveniently. The CCU2 control unit does not even require any programming knowledge, because the desired tasks are simply selected using the graphic interface.
Do not shut down the roller shutters when the rotary handle contact is open …
In our first Window Rotary Handle Sensor programming example, we will create a program that will prevent the shutters from coming down when the patio door is closed but the patio door handle is open and you are probably in the garden.
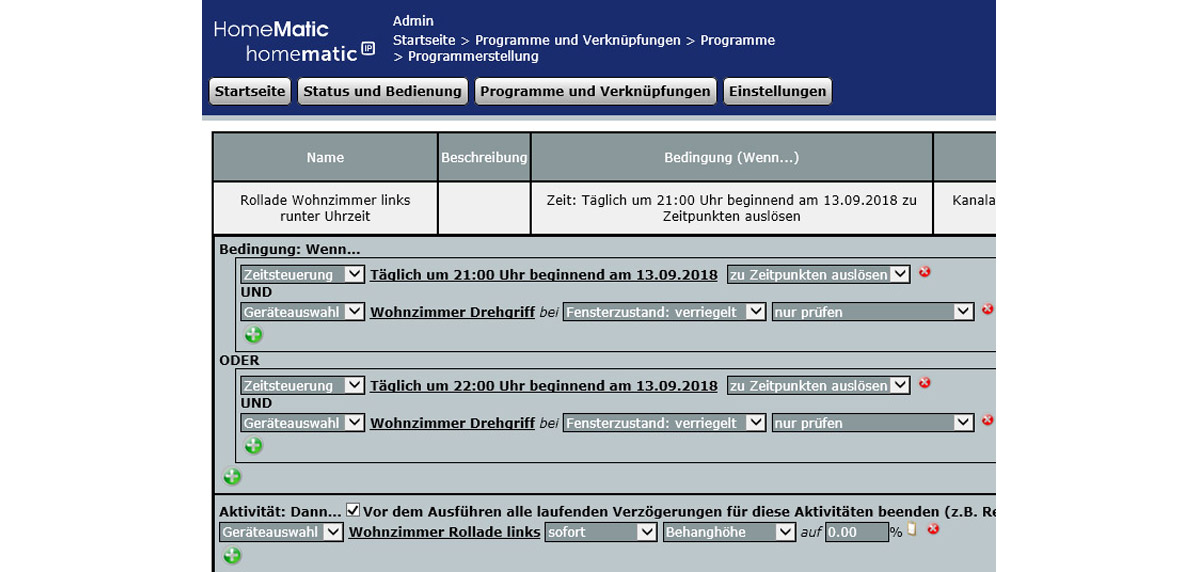
To do this, select in the Homematic CCU2 surface Programs and connections -> Programs -> New and give it a meaningful name (and a description if necessary).
Then you normally select the desired times when the shutters are to be lowered during the week and when the shutters are to be lowered at the weekend under “Activity: Then …” (see shutter programming instructions).
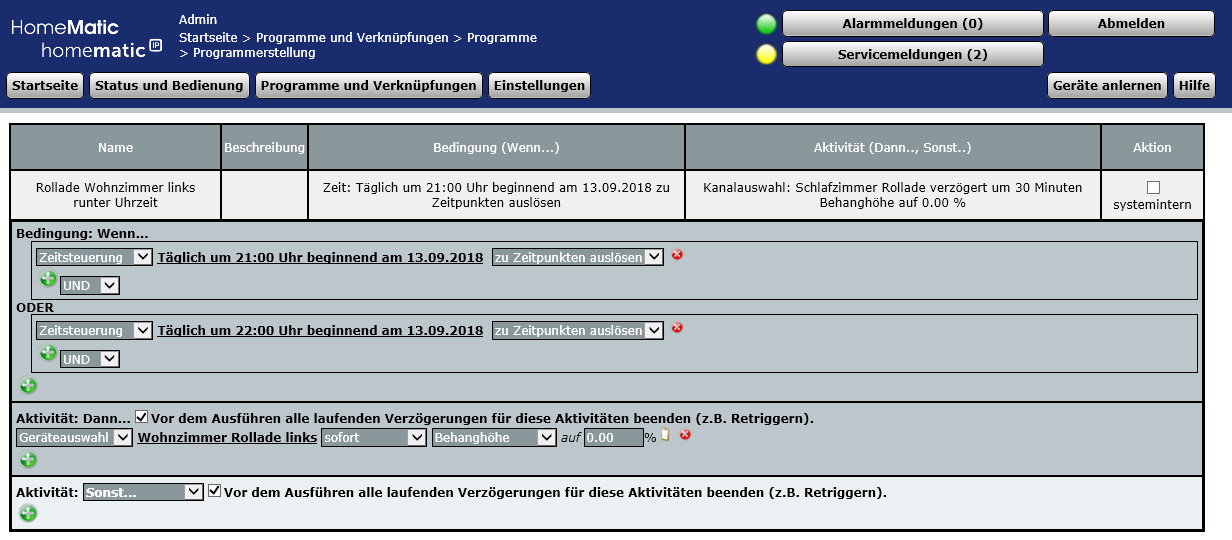
In order to prevent the roller shutter(s) from lowering when the door is open, you now additionally select the desired rotary handle sensor (in our case “living room rotary handle”) during activity via the green plus symbol next to “AND” -> Device selection -> the desired rotary handle sensor. Now select “locked” for window status and “check only”. You can now make this selection for the weekend, at least if you have programmed special times for it.
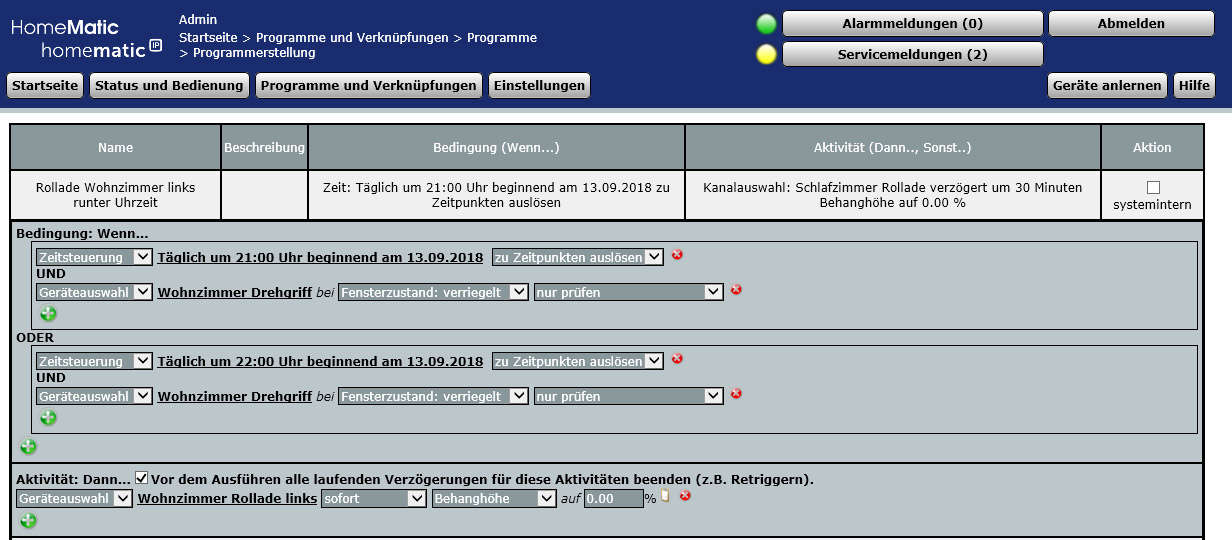
And already the shutters only lower when the door handle is closed!
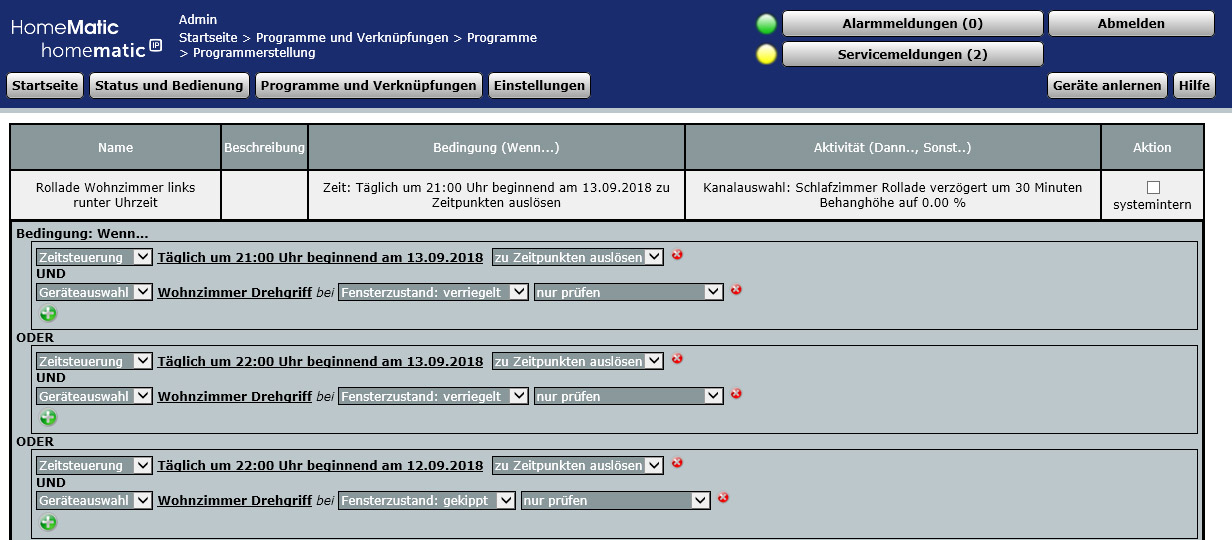
Alternatively, you could also lock the shutters when the window or door is tilted, by programming this additionally with “window state tilted”, but in our opinion this would only be interesting for ventilation.
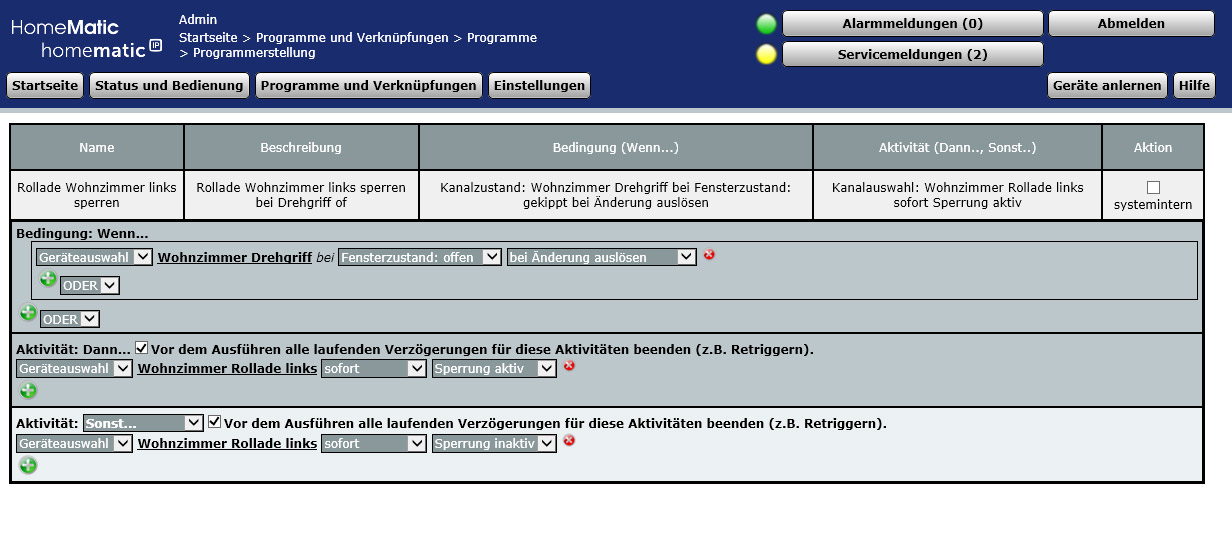
Lock shutter actuator when rotary handle contact open …
A second method would be to lock the shutter actuator when the door handle or window handle is opened or tilted.
To do this, select again via Device selection -> the desired HM-Sec-RHS rotary handle sensor, this time select window state open and trigger when changed. Now select “Activity: Then …” via Device selection -> the desired Shutter Actuator -> Immediately -> Blocking active. Now select “Activity: Otherwise …” via Device selection -> the desired Shutter Actuator -> immediately -> blocking inactive.
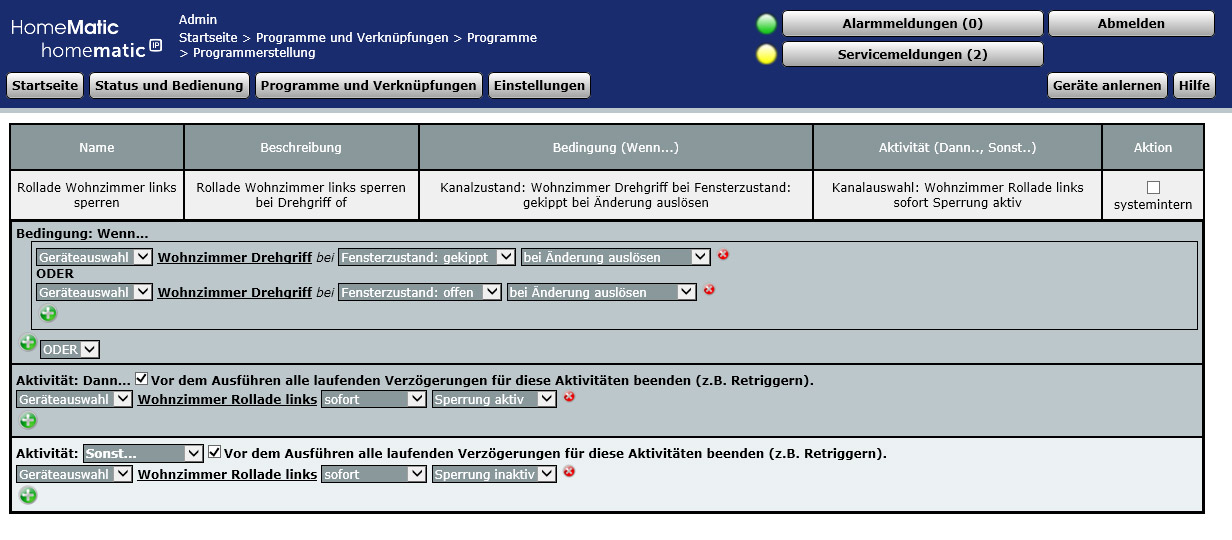
Alternatively, the shutter actuator could also be locked when the window or door is tilted open. To do this, select the desired rotary handle sensor via Device selection -> the desired rotary handle sensor, this time select window state tilted and trigger on change, select again linked with “OR” via Device selection -> the desired rotary handle sensor, select window state open and trigger on change. Now select “Activity: Then …” via Device selection -> the desired Shutter Actuator -> Immediately -> Blocking active. Now select “Activity: Otherwise …” via Device selection -> the desired Shutter Actuator -> immediately -> blocking inactive.
This setting automatically locks the shutter actuator(s) so that they can no longer be operated with the shutter actuator button. However, they can still be operated via the control panel or via an app!
So if you want to use the second method in a meaningful way, you would have to additionally query a possible lock of the shutter actuator in all programs. For us, the second method with a shutter actuator lock is not recommended, unless you want to avoid being locked out by someone else (or knowingly? 😉 ) via the shutter actuator.
For those who just want to avoid being locked out by automatically lowering shutters, the first method is more advantageous.
By the way, if you want to create a similar programme several times, you can call up the old programme, then enter a new name and then select “Save settings as new programme”.
After creating the programme, you should definitely select in the programs overview whether the programme should be active, operable and visible. The above shown programs with time control via the “if” condition you want to activate and do not need any operation. If you make these programmes visible is up to you. Depending on the number of programmes, however, it can quickly become confusing and it is therefore advisable to only make visible those programs that you want to operate later (e.g. via an app).
Tip: If you would like to sort the Homematic programs alphabetically, simply go to Status and Operation -> Programs in the CCU2 control unit and the programs will be sorted alphabetically the next time you view them. By the way, with the latest Homematic CCU2 Firmware Update the programs are sorted automatically.
We hope that this little guide will help you and if you have further questions we will help you as usual in the Homematic Forum which is also available as English smart home community.
Read the Homematic Window Rotary Handle Sensor review …
Discuss in our forum and share experiences about the Teaching Guide …
Here you can buy the Homematic Window Rotary Handle Sensor as kit at a reasonable price. *Ad