

In the following instructions, we show beginners how to create programs for the Homematic blind actuator in order to control the blind, roller shutter and marquee comfortably via app or time.
Create shutter actuator programs …
Programs can be used to perform complex tasks in the Homematic CCU2 Central Unit and to combine several actuators comfortably. The CCU2 control unit does not even require any programming knowledge, as the desired tasks are simply selected using the graphical user interface.
In our Shutter Actuator demonstration, for example, we create a program that allows you to raise or lower all shutters at the push of a button or at the desired time.
To do this, select in the Homematic CCU2 interface Programs and connections -> Programs -> New and assign a meaningful name (if necessary, a description).
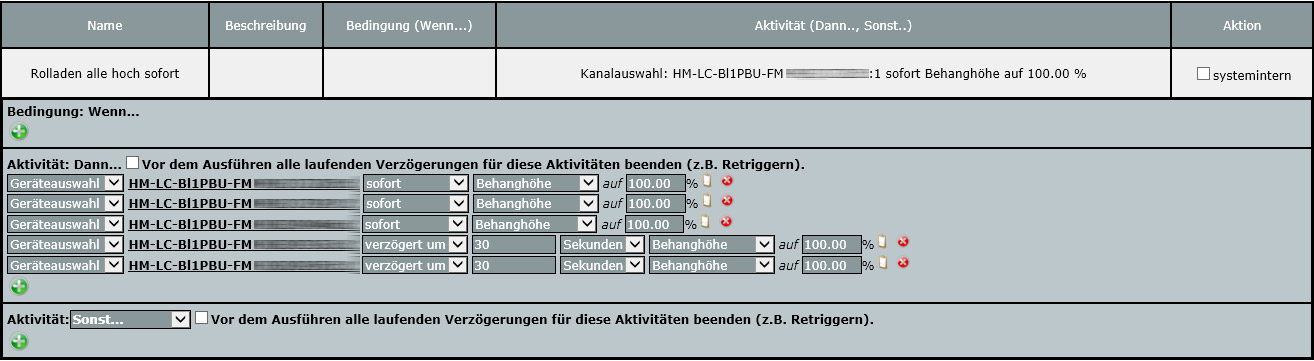
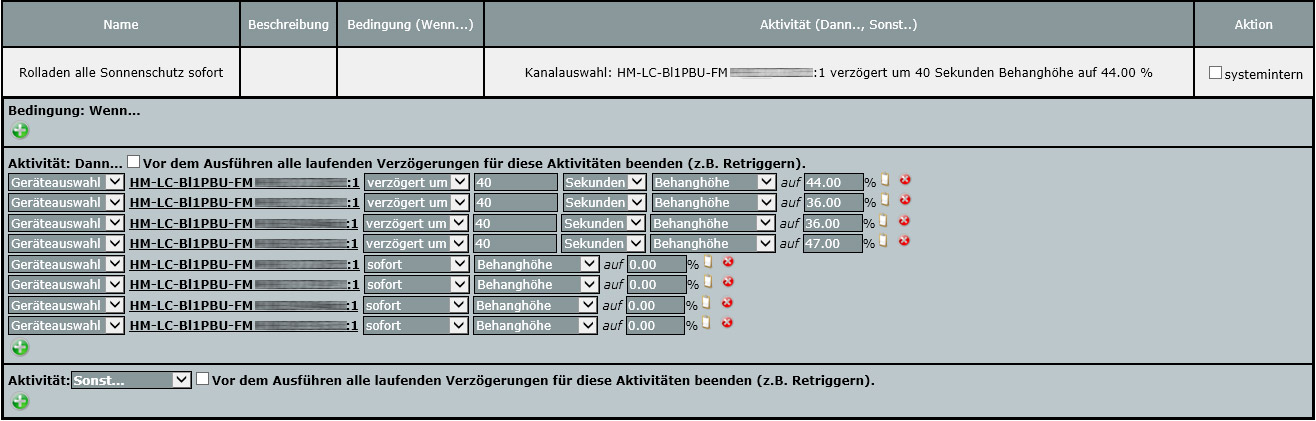
Then select the desired sunblind actuator for activity via the green plus symbol -> Device selection -> the desired sunblind actuator.
For the shutter actuator (HM-LC-BI1PBU-FM … :1) -> immediately -> then blind height -> to 100% (i.e. upwards). If you want, you can also add a small delay to avoid peak voltages. Simply select “delayed by” instead of “immediately” and enter the desired value in seconds, minutes or hours.
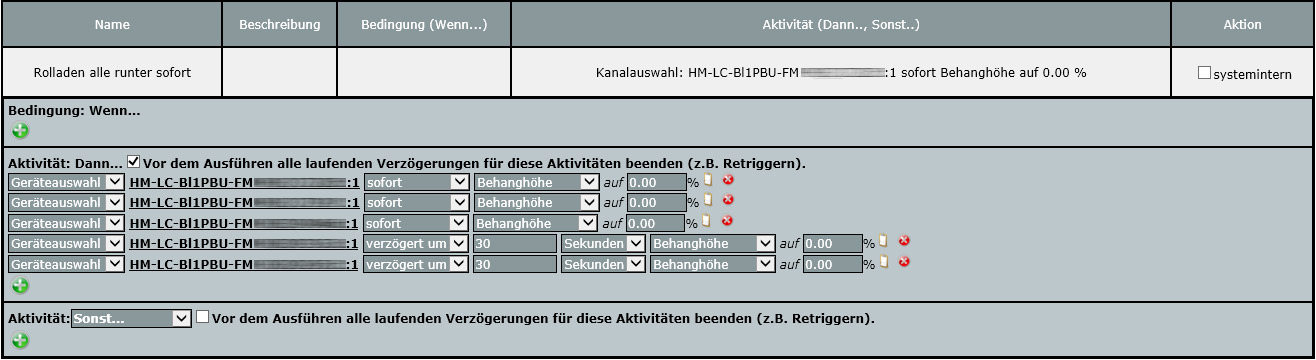
According to this concept, a program for shutting down is then created and these programs can then be operated comfortably via app.
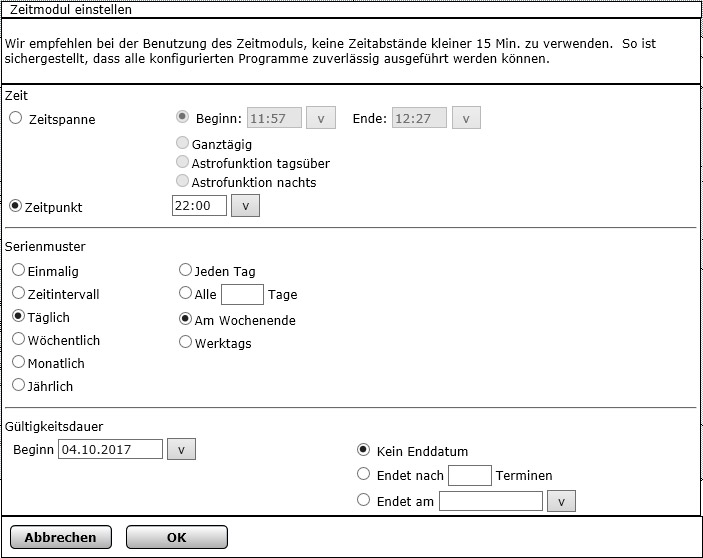
Since you would like to automate your Smarthome a little bit, you can create additional programs with the desired times for starting and stopping. To do this, click on the green plus sign at “If” and select time control. Now select the desired time for working days. Then click on the green plus sign at “Or” and select the times for the weekend. Because on the weekend you usually want to get up a little later or darken the room. Now select the desired shutters as before and enter the delays.
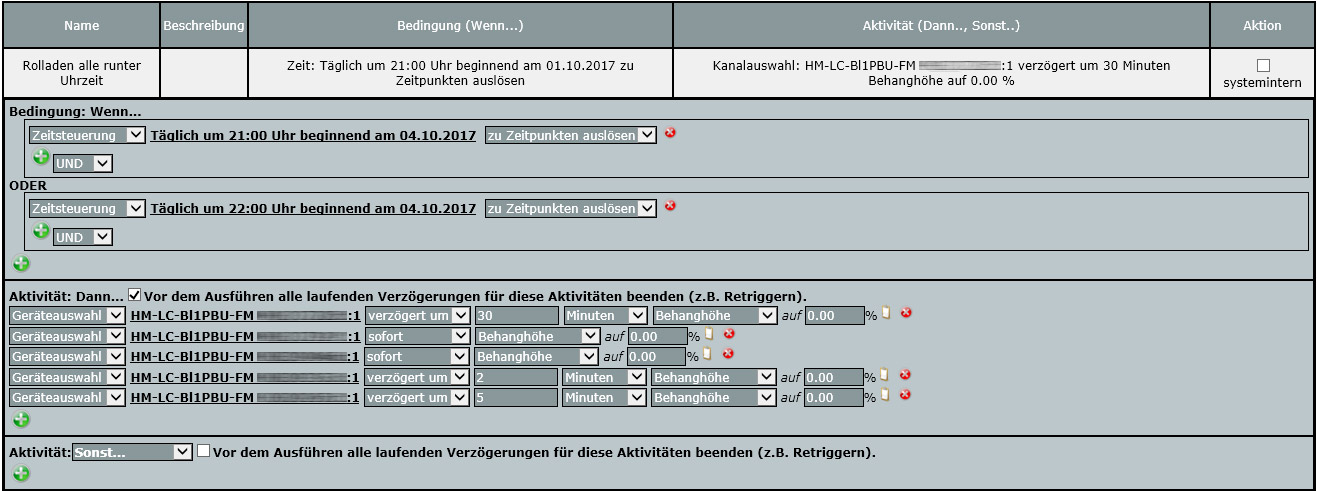
This is what the time module looks like, which allows extensive settings for time control. In the example, the command is executed at 10 pm on the weekend. It is also possible to set the start and end time depending on the season or enter a time span for variations.
Last but not least, you could also lower all the shutters to a desired height for sun protection in strong sunshine by simply entering the height of the curtain. To do this, simply lower the roller shutter completely by hand and then set it to the desired height. Now request this percentage value of the height via the CCU2 control unit or via the app and then enter this value as a percentage of the blind height. Since the percentage values always vary slightly depending on the previous position of the roller shutter, we will let the roller shutters in this example program first be lowered completely and then return to the desired sun protection height. This saves the calibration drive and allows the same value to be controlled from every awning height.
If you want to create a similar program several times, you can call the old program, then enter a new name and select “Save settings as new program”.
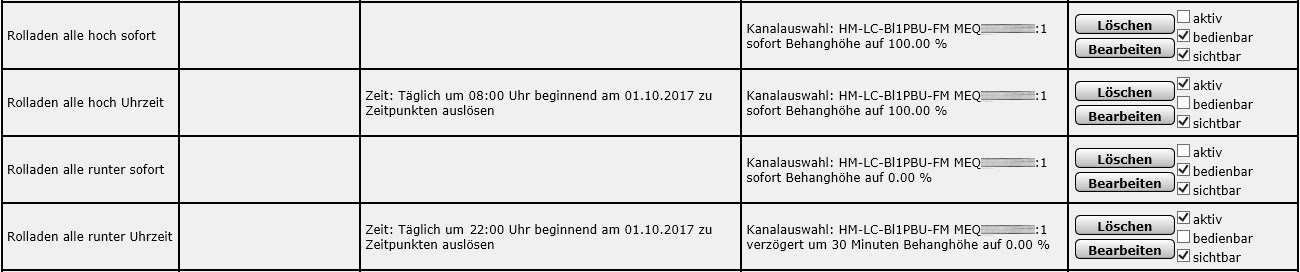
After the program creation you should select in the overview of the programs whether the program should be active, operable and visible.
Since you do not want all the shutters to be raised or lowered, for example, after a restart of the CCU2 control unit, these programs must be deactivated without “if” condition after creation. However, you should check the box for “operable and visible” to be able to see and operate it in a smartphone app!
The programs shown above with time controls via the “if” condition are to be activated and do not require any operation. If you want to make these programs visible is up to you. However, depending on the number of programs, it can get confusing and it is recommended to make only those programs visible that you want to use.
Tip: If you would like to sort the Homematic programs alphabetically, simply go to Status and Operation -> Programs in the CCU2 Control Center and the programs will be sorted alphabetically the next time they appear.
This guide to the Shutter Actuator programs will be expanded in the course of time, as there are of course many more possibilities.
We hope that this little guide will help you and if you have any questions we will of course help you in our Homematic Forum.
Read the Homematic Shutter Actuator review …
Discuss in our forum and share experiences about the Shutter Actuator Teaching Guide …
Here you can buy the Homematic Shutter Actuator as kit at a reasonable price. *Ad