

In this small Homematic Shutter Actuator Teaching Tutorial for beginners, we show today on Funkyhome.de how to teach-in a Homematic Shutter Actuator to the Homematic control unit and how to set up the wireless shutter actuator.
Teaching the shutter actuator to the Homematic CCU2 …
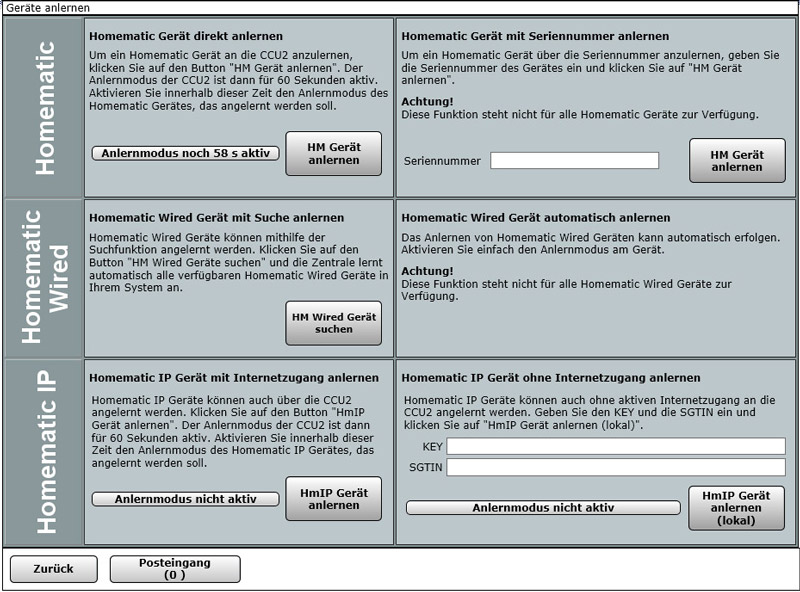
To teach the shutter actuator to the CCU2, select Teach-in devices after accessing the Homematic CCU2 interface top right and start the teach-in mode with the Teach-in HM devices button. Now the central unit waits for 60 seconds for new devices, which you want to connect to the central unit by pressing the Config button on the respective device (the Config button can be found under the toggle switch).
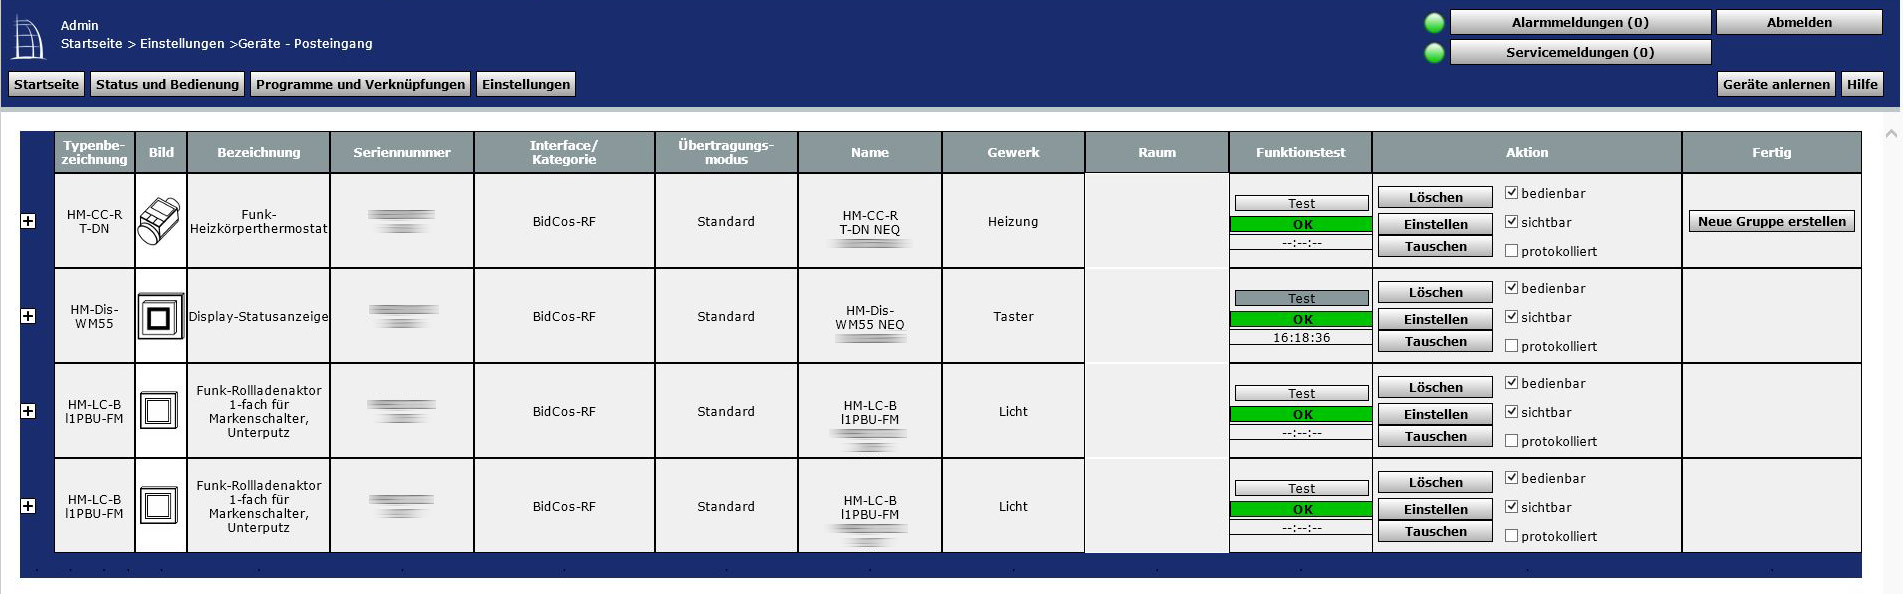
Now click on the inbox, where you can find the learned devices. So don’t be surprised if the device does not yet appear in CCU2, it must first be confirmed! This is now done with all the learned devices and you can then rename and assign them, program dependencies and adjust them with the previously mentioned points. Here you can see a Homematic radiator thermostat above, a Homematic Display below it and then two Shutter Actuators HM-LC-BI1PBU-FM, which are the subject of today’s tutorial and the Homematic Shutter Actuator Review.
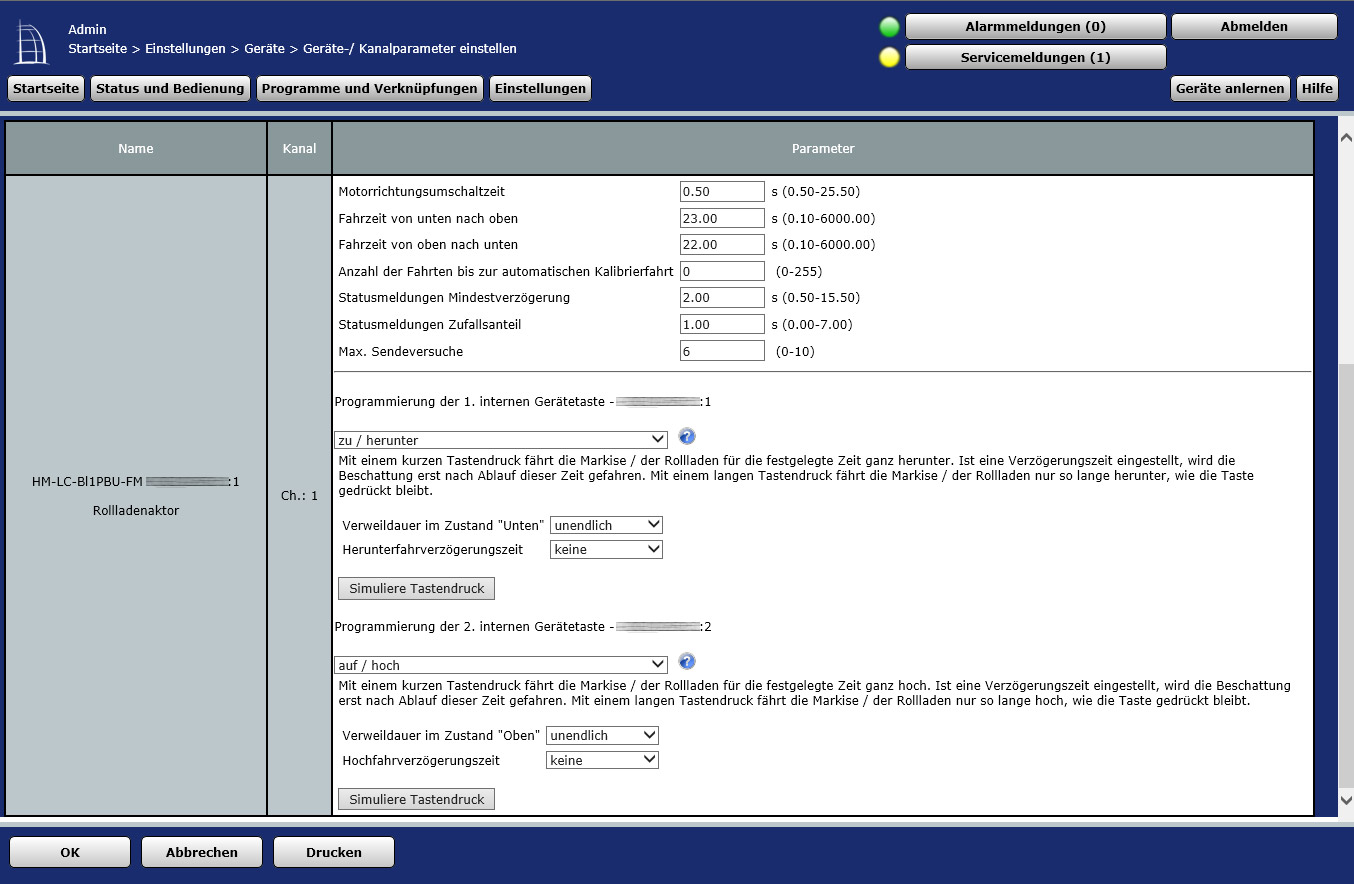
Now we can make a few basic shutter settings via “Settings” or later via Settings -> Devices -> Adjustment. The time from bottom to top (and vice versa) is best measured briefly for each roller shutter with a stopwatch. This will result in a percentage value of the blind height, which we will need later for the Homematic programming and which is also displayed in the apps. It is best to add approx. 2 seconds to the measured value so that the roller shutter or awning still retracts and extends completely after several short changes of direction, even without calibration run. If you wish, you can also select an automatic calibration run after a desired number of runs or deactivate the function with 0. An exchange of the buttons is also possible, but we would rather advise against it, as later on the apps do not show the correct status. It’s better to mount the shutter actuator directly in the UP box so that the front lettering is correctly legible, and select line L1 or L2 for the correct direction of travel.
We hope that this little guide will help and if you have any questions we will of course help you in our Homematic Forum.
Read the Homematic Shutter Actuator review …
Discuss in our forum and share experiences about the Shutter Actuator Teaching Guide …
Here you can buy the Homematic Shutter Actuator at a reasonable price. *Ad