

In this small Homematic Window Rotary Handle Sensor Teaching Tutorial for newcomers we show today on Funkyhome.de how to teach a rotary handle contact from eQ-3 to the Homematic CCU2 control unit, how to set up the Wireless Window Rotary Handle Sensor and how to solve possible Homematic rotary handle contact problems.
Teach Rotary Handle Sensor to the Homematic CCU2 …
To teach the Window Rotary Handle Sensor to the CCU2, select after entering the Homematic CCU2 GUI in the upper right corner and start the teach mode with the Teach HM devices button. Now the central unit waits 60 seconds for new devices, which you want to connect to the central unit by pressing the Config button on the respective device (the Config button is located under the battery cover and can be pressed with a pointed object).
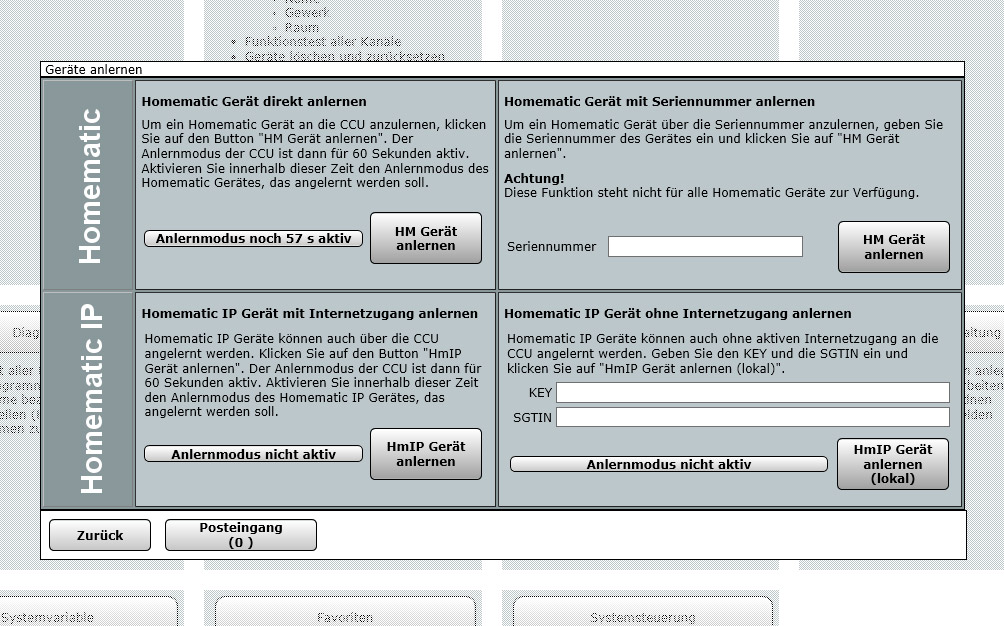
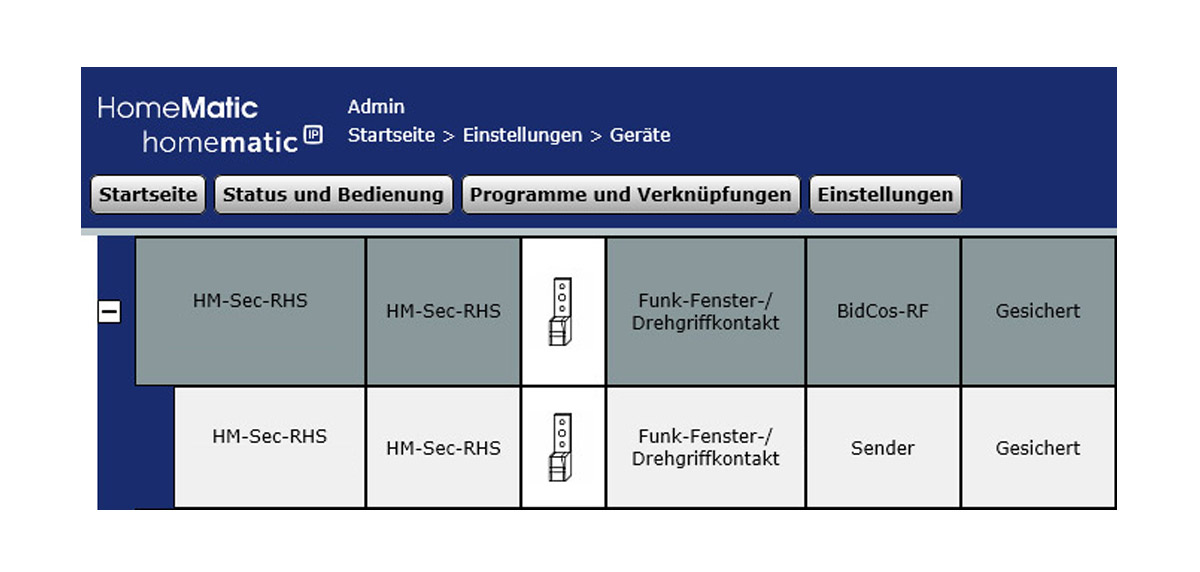
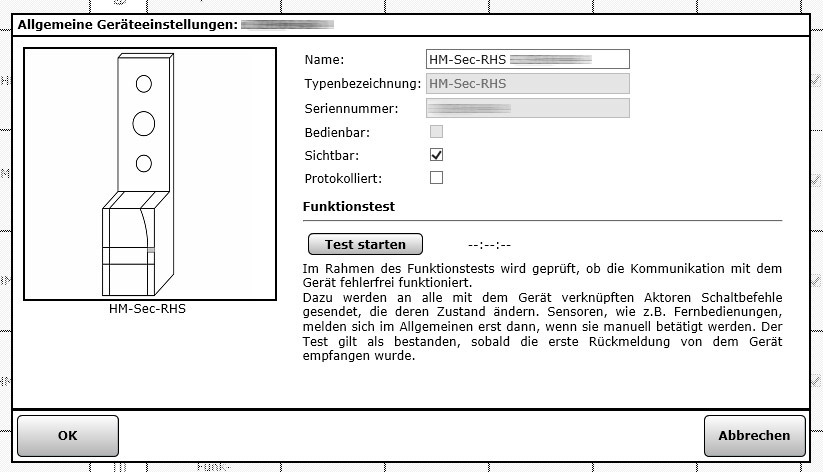
Now click on the inbox, where you can find the learned devices. So don’t be surprised if the device does not appear immediately in CCU2, it must first be confirmed via the inbox! Now you can rename, assign, program dependencies and adjust them with the previously mentioned points. Here you can see the Window Rotary Handle Sensor HM-Sec-RHS, which is the subject of today’s manual, which we tested in the Homematic Window Rotary Handle Sensor Review.

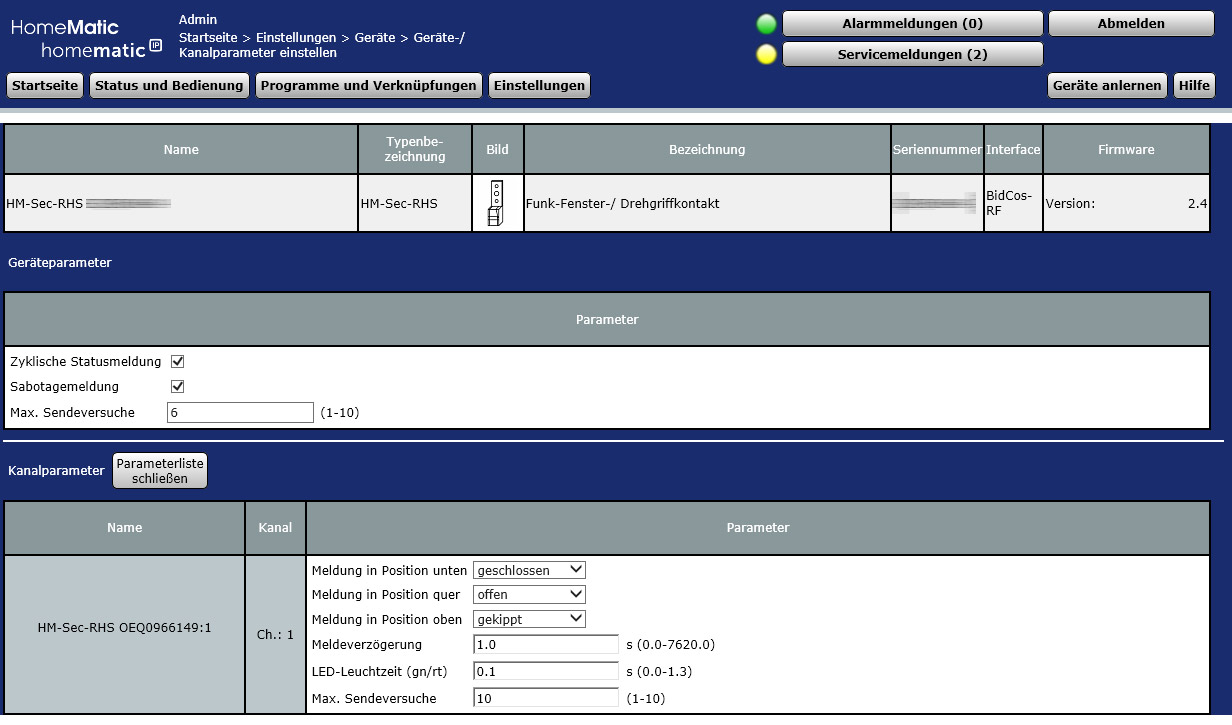
We can now make some basic settings via “Adjust” or later via Settings -> Devices -> Adjust some rotary handle contact. There you can find the cyclic status message, the sabotage message when removing the cover, the maximum transmission attempts and channel parameters.
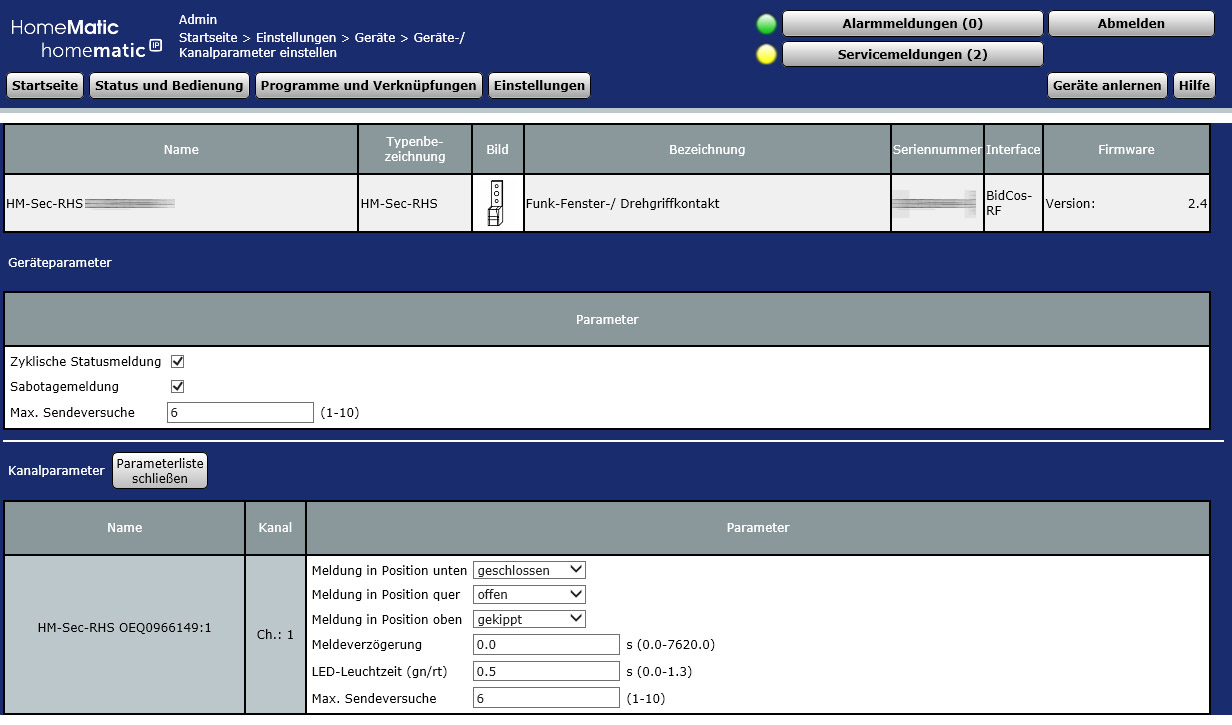
With the rotary handle contact channel parameters you can assign all three eccentric positions, e.g. to exchange open and tilted.
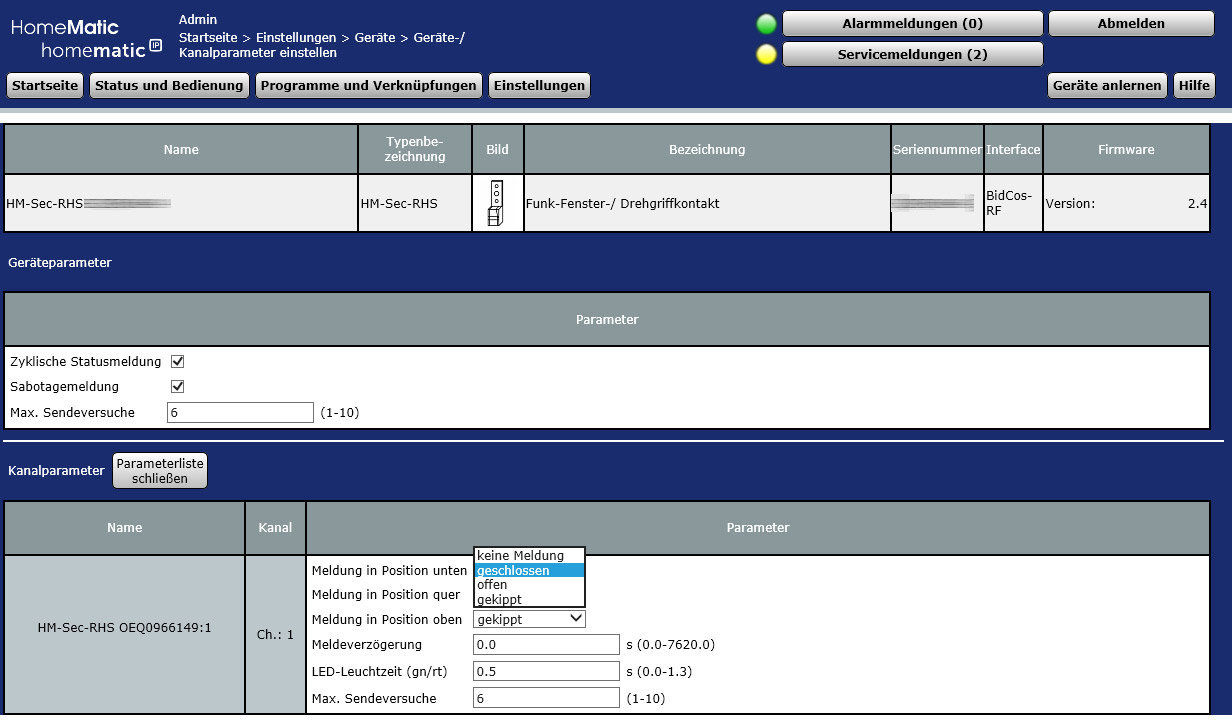
If there are problems with the rotary handle contact during transmission, you can increase the maximum number of transmission attempts to 10, set a message delay of 1 second and reduce the light time to save battery power or, if desired, deactivate it completely with 0.0 seconds.
If we save these settings with OK, we first get an error message “The transfer to the device could not be performed properly. Select Check again or Ignore”.
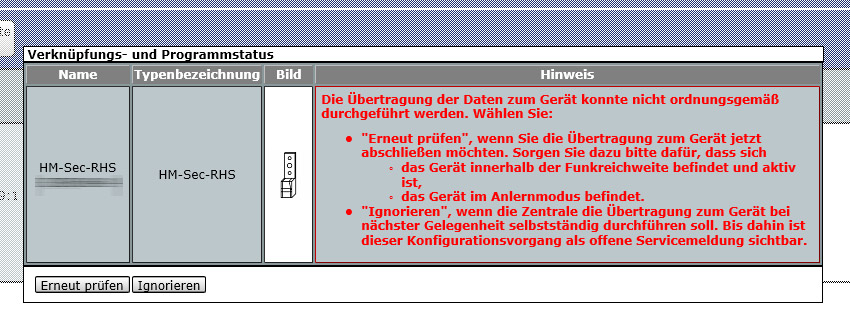
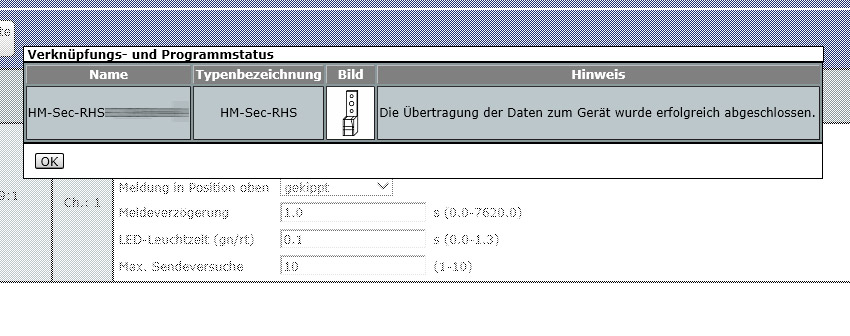
The solution is obvious, because the rotary handle contact is not continuously connected to the central unit, but can be moved to a connection without any problems by means of the learn button, in order to pick up the new settings immediately.
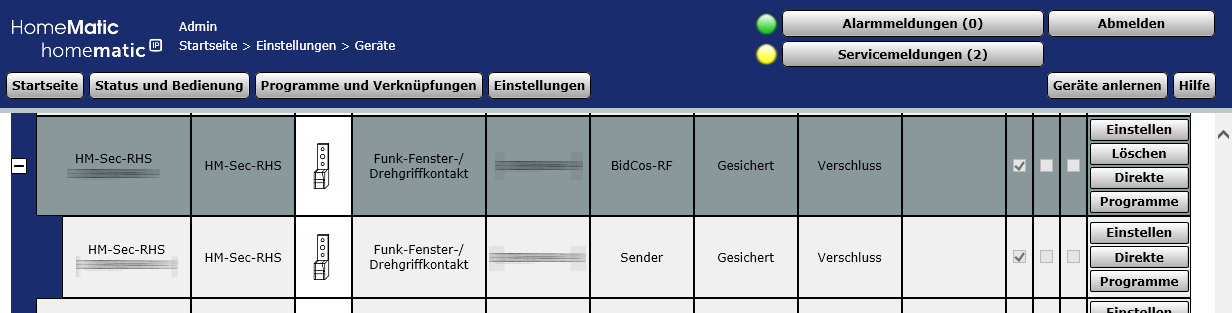
Now we find the twist grip contact via Settings -> Devices.
But since the name HM-Sec-RHS followed by the serial number is not too memorable …
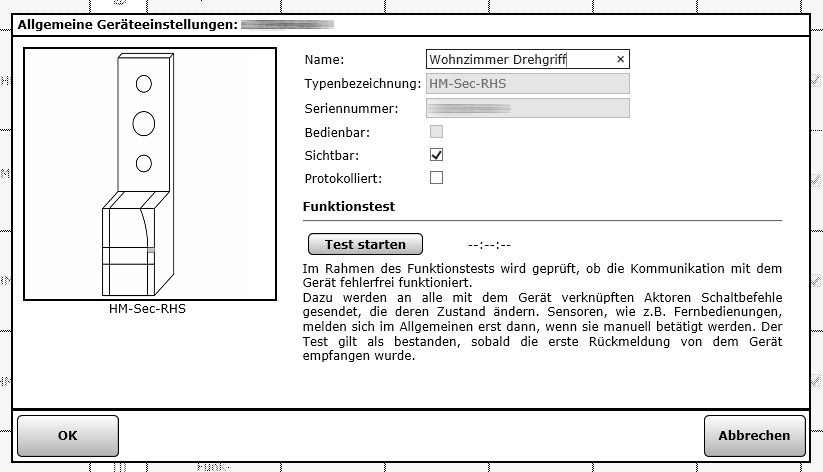
… we can change it with a short click on the name – for example in living room twist grip. Living room door is already occupied by the window contact.
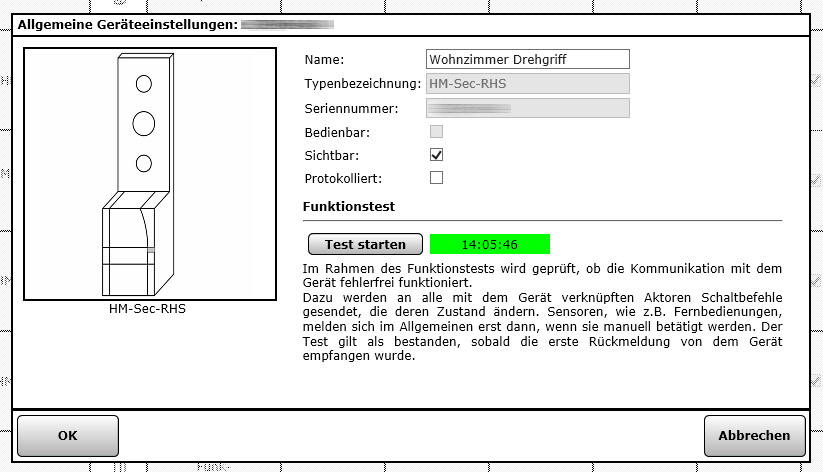
If you like, you can also start a short test of the twist grip contact there.
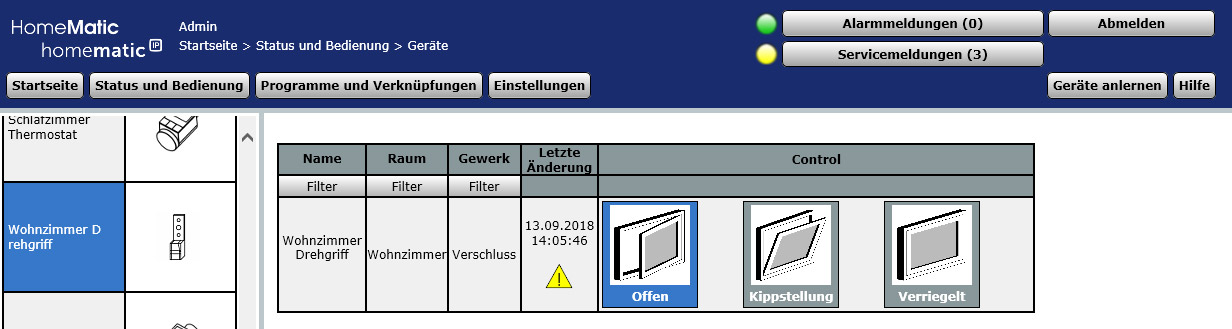
Now the name is already correct, but the assigned room is still missing. We can assign it with a click on the room field or via Settings -> Assign rooms.

You can or should assign a room to the Homematic rotary handle contact or each Homematic device so that you can easily find it later e.g. via an app.

Last but not least, we can test the Homematic Window Rotary Handle Sensor again via “Status and Operation -> Devices” and thus check the eccentric positions, i.e. the door handle or window handle positions.
We hope that this little tutorial helped you to learn how to use the twist grip contact and if you have any questions we will help you as usual in our Smarthome Forum which is also available as English smart home community.
Read the Homematic Window Rotary Handle Sensor review …
Discuss in our forum and share experiences about the Teaching Guide …
Here you can buy the Homematic Window Rotary Handle Sensor at a reasonable price. *Ad