

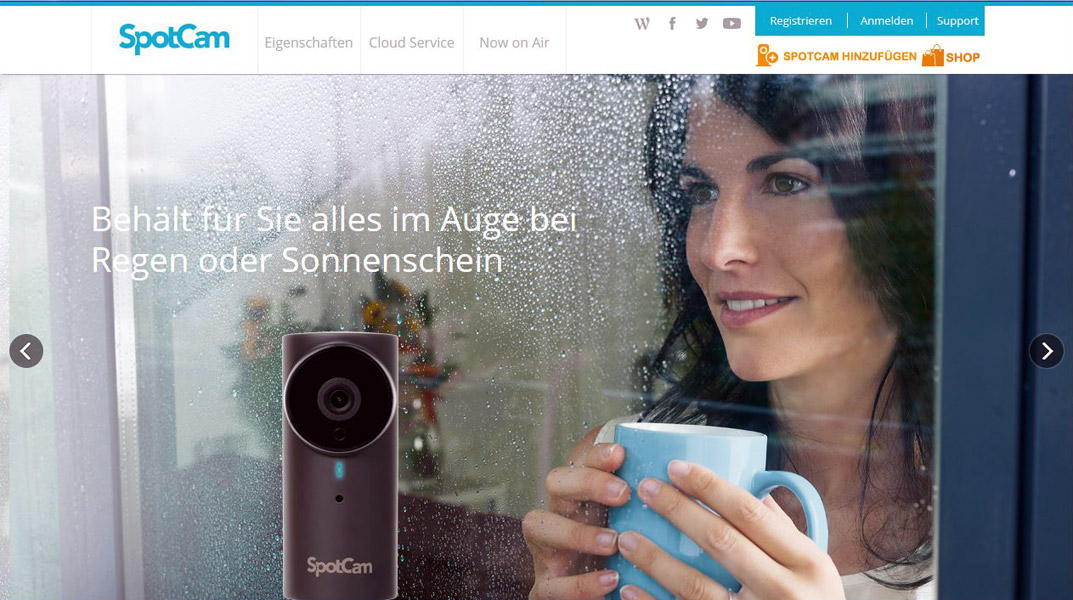
Based on the SpotCam HD Cloud Camera we have written a German SpotCam HD installation guide how to set up a WLAN Cloud Camera step by step.
Many thanks for the support …
Many thanks for the support to the manufacturer SpotCam.
Here you can buy SpotCam HD. *Ad
WLAN Cloud Camera Installation …
The SpotCam installation is relatively simple. We connected the WLAN cloud camera to an AVM Fritzbox and set it up. At this point we do not yet connect the SpotCam HD to the router or to the power outlet.
First you need a PC, Mac, notebook or a smartphone with WLAN (2.4GHz b/g/n) that is connected to the Internet. So there is an app for iOS, for Android and for Windows available. In our example we use a notebook with Windows 7.
With this you can access the myspotcam.com website, where you can also see a lot of public webcams.
Now click on Add Spotcam in the upper right corner and you will be asked to install Add_SpotCam.exe.
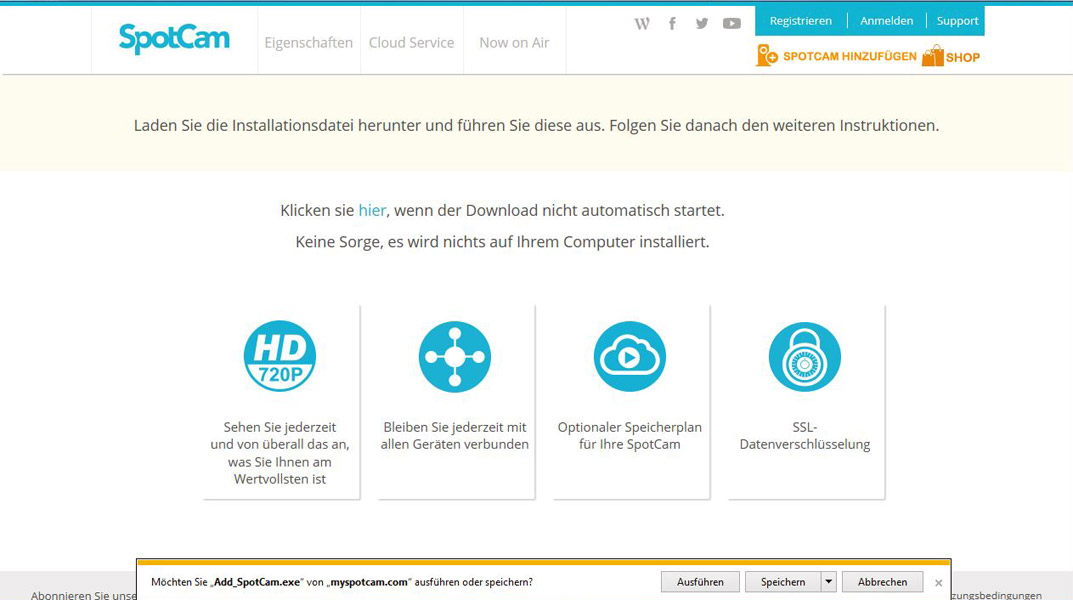
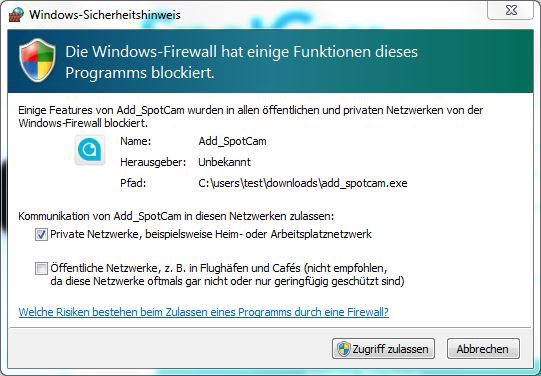
Depending on the firewall, you may be asked to select the desired network profile.
Now we start with the setup.
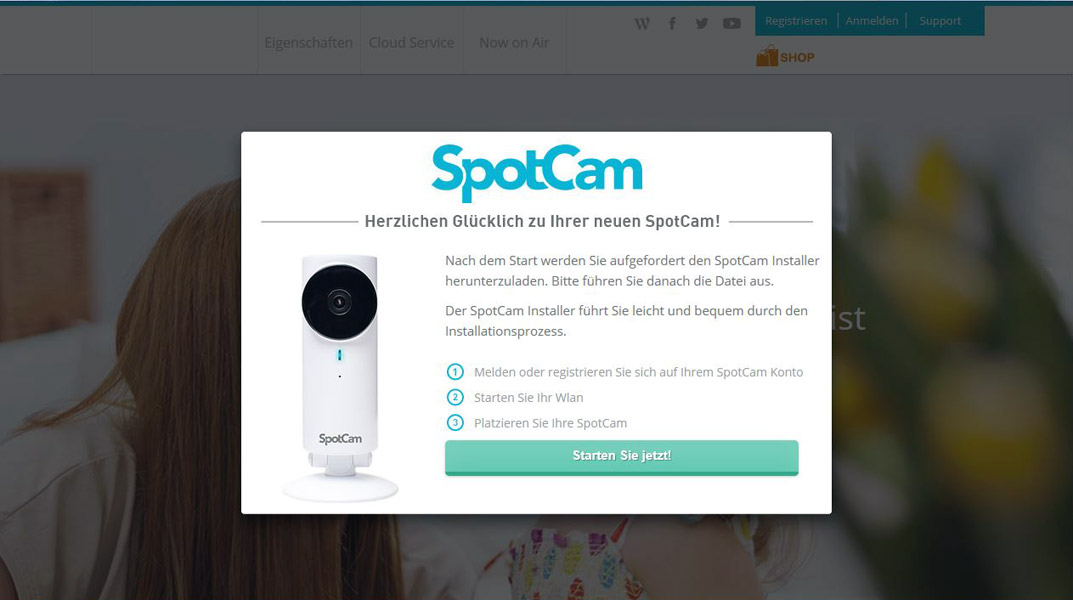
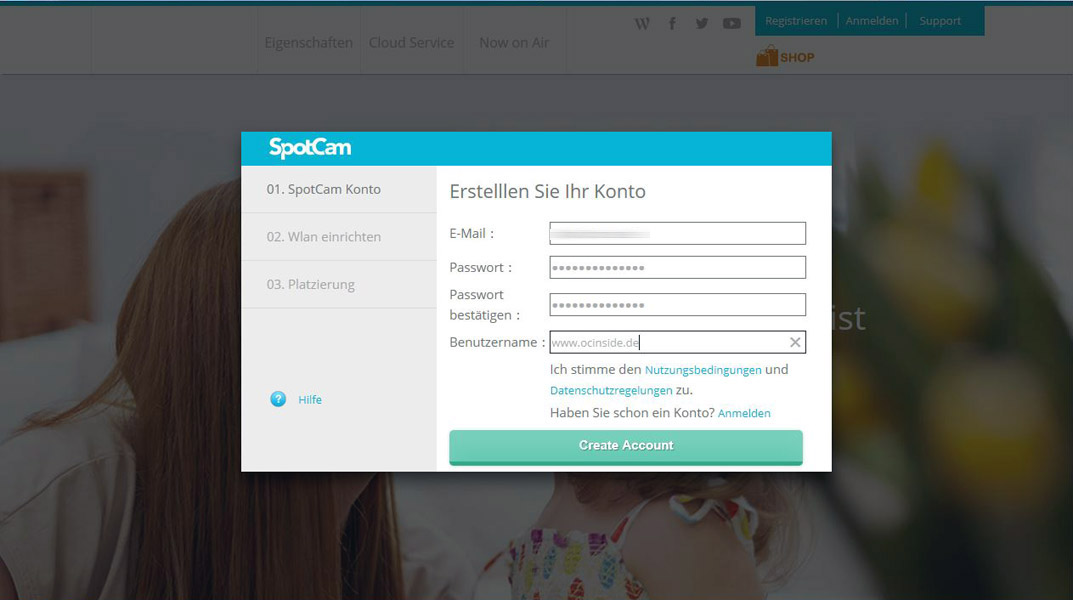
First we create a SpotCam account by registering there.

Enter username, password and email address and click Create Account.
Now confirm the verification mail …
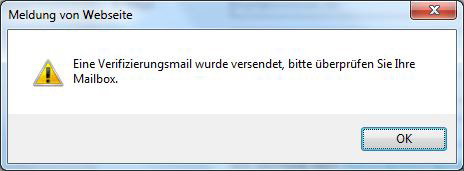
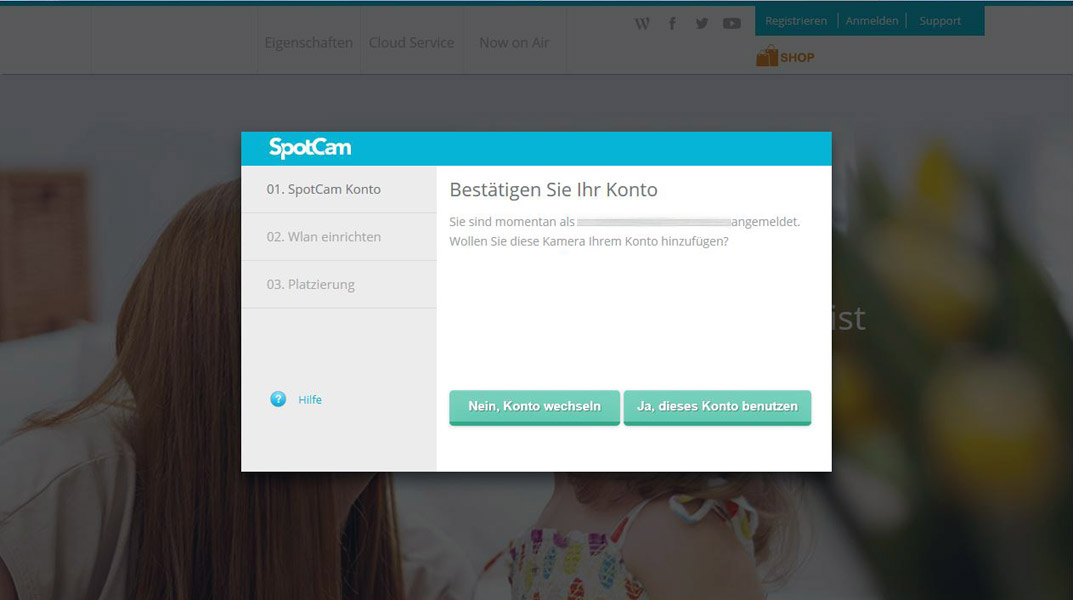
… which you receive immediately afterwards and logs in to SpotCam with this user data.
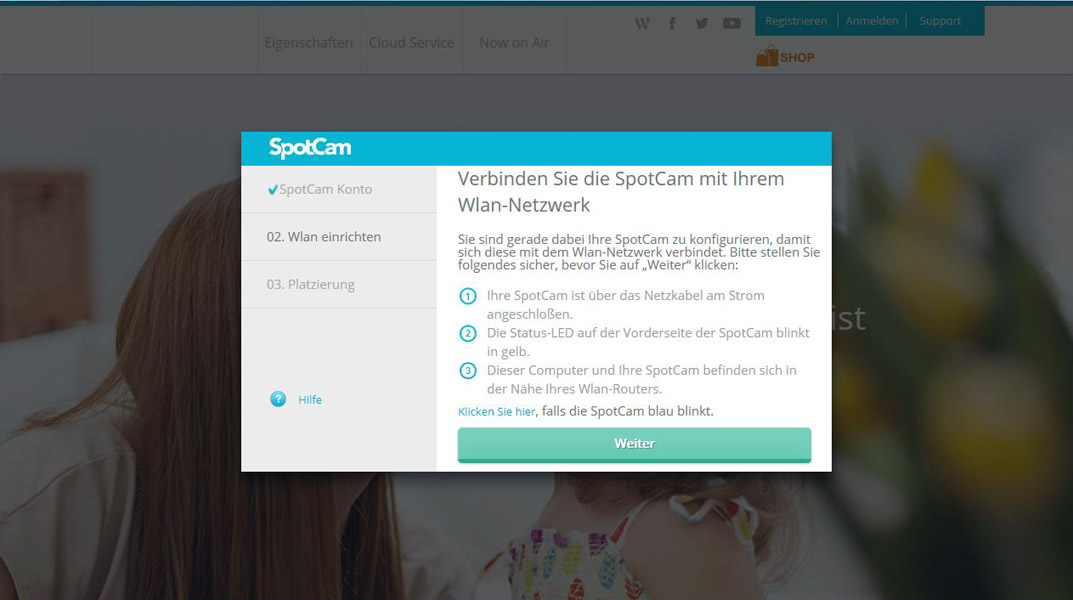
Only now do we connect the SpotCam HD to the power outlet and wait until the LED on the front lights up orange, the rear selector switch must be set to “AP”. Now we confirm with Next.
Then click on the WLAN icon in the taskbar and connect to the SpotCam HD.
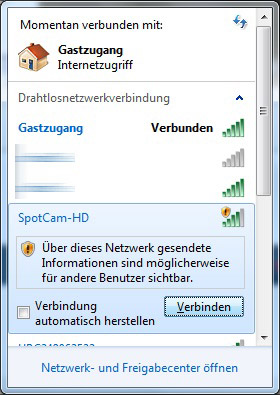
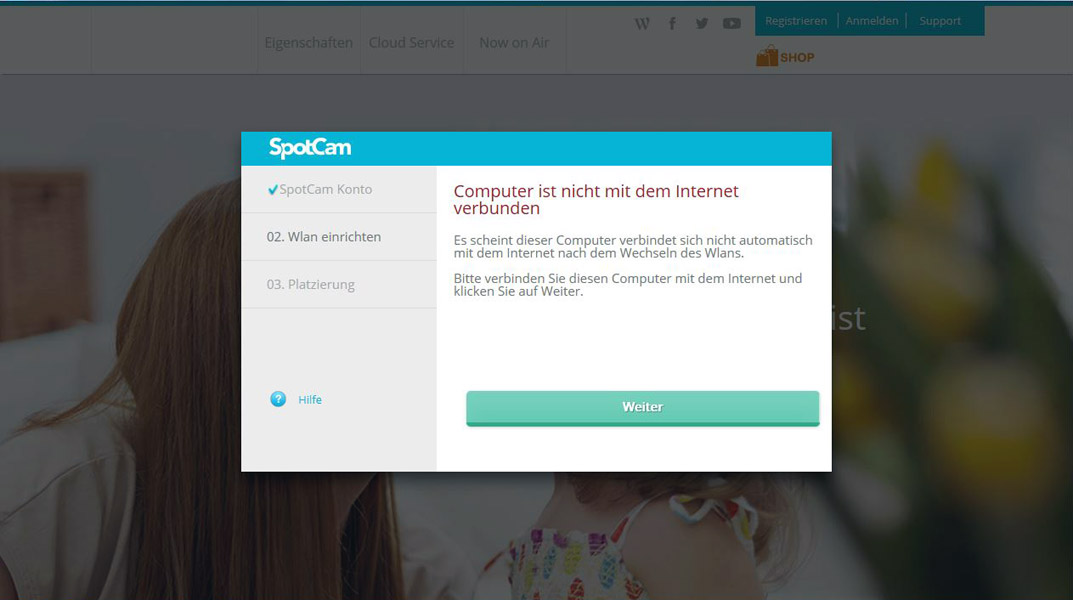
If it does not work, but with the error message “No connection could be established with this network”, you must first deactivate your own WLAN connection.
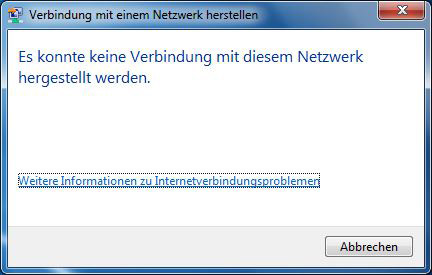
Now try connecting to the SpotCam HD again.
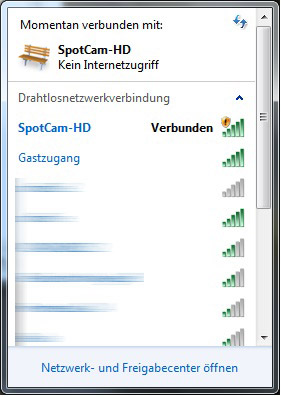
When the WLAN connection is established, the process continues.
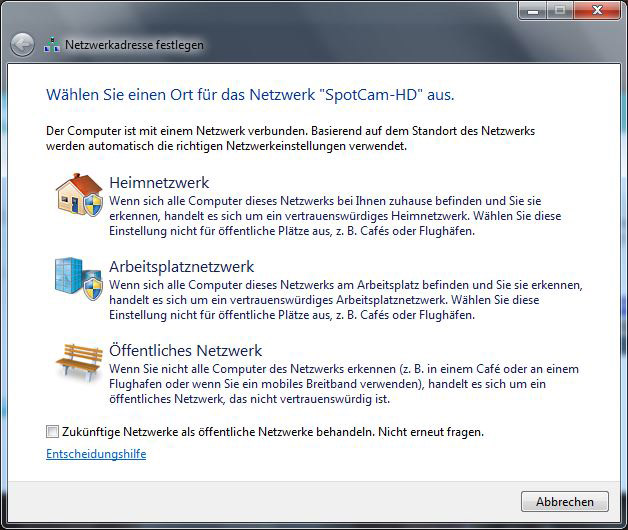
Now we get the message again, that we should choose the location for the network, in our case home network.
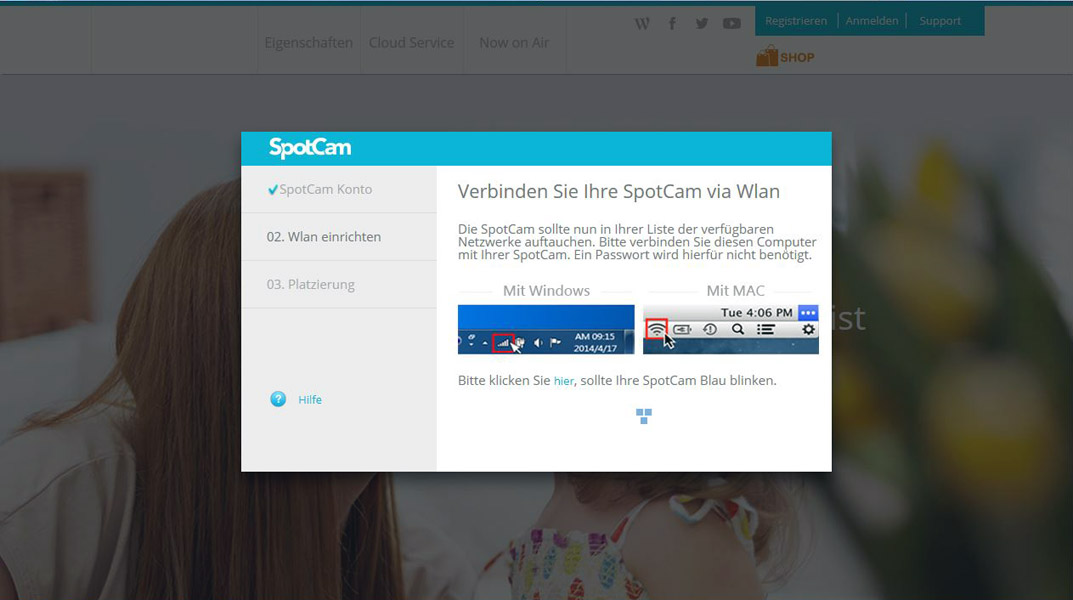
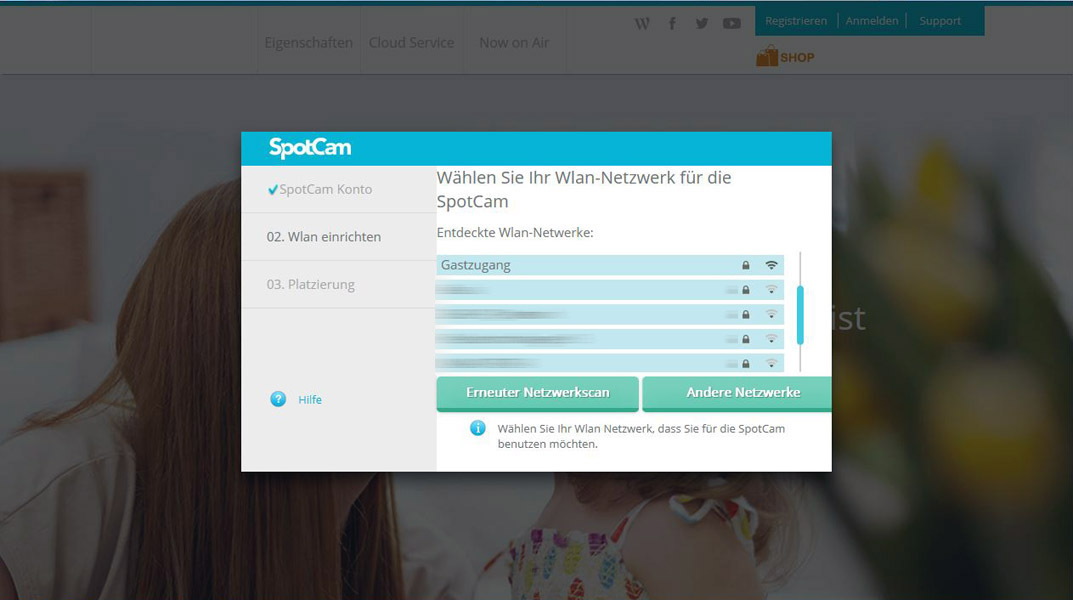
Now we connect the SpotCam via WLAN and select the WLAN network (e.g. the AVM Fritzbox Router, not the SpotCam) in the following window, with which the SpotCam HD will connect to the Internet in the future. In our case this is called WLAN guest access.
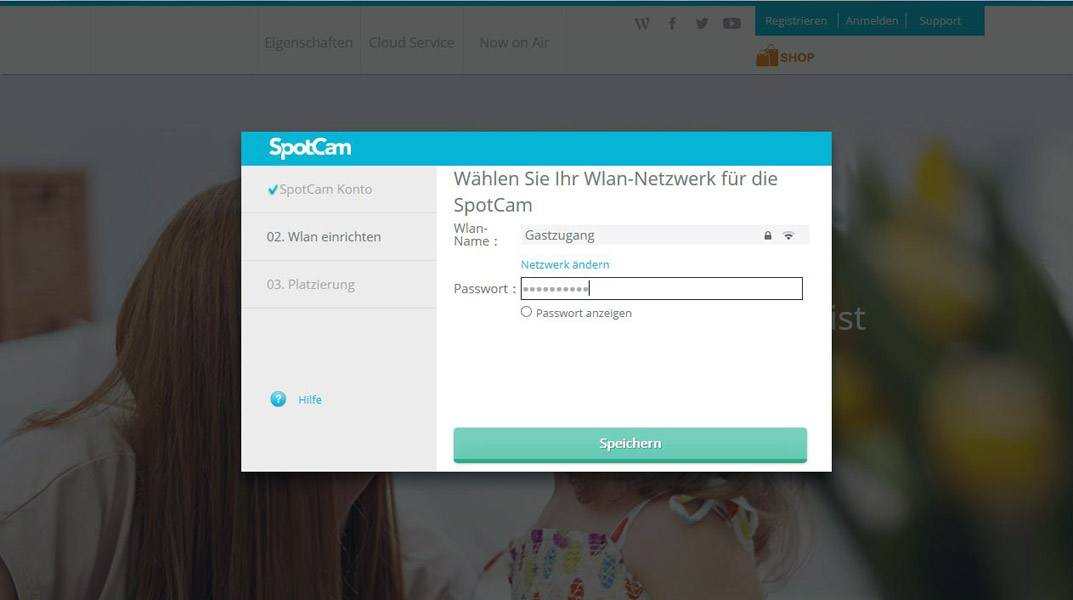
Of course the WLAN access password is still required.
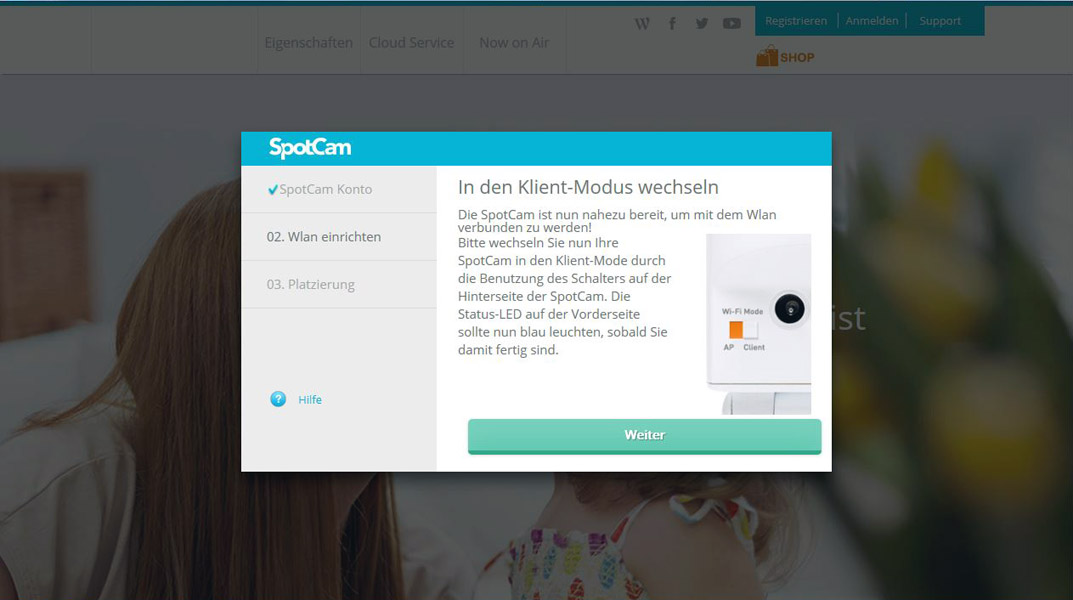
Now we switch the selector switch on the SpotCam HD to Client …
… reconnect us to the Internet via WLAN and confirm with Continue.
If everything worked out, we should now see our first webcam picture via the SpotCam window …
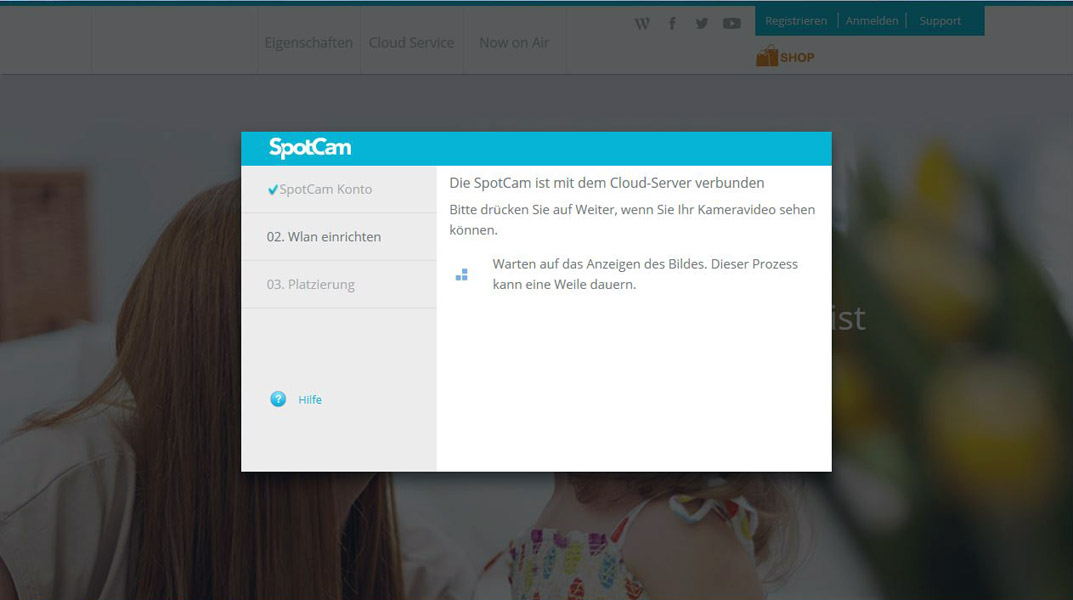
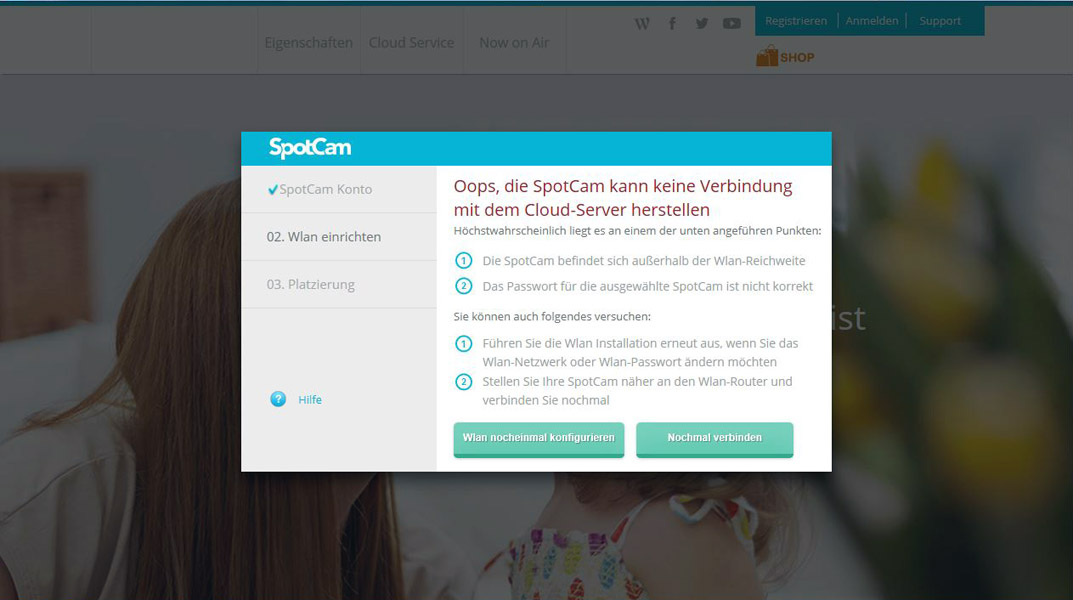
… at least if the firewall allows incoming connections and the router is configured so that the SpotCam HD can connect via all required ports, otherwise this error message will appear.
But now!
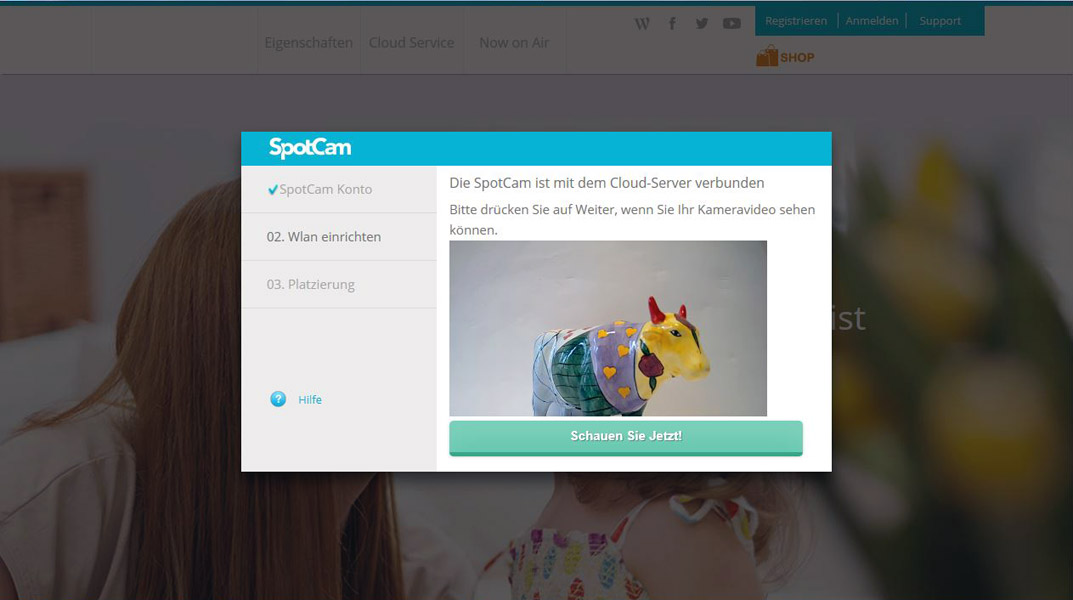
That’s it, the SpotCam HD is set up and can now be accessed online.

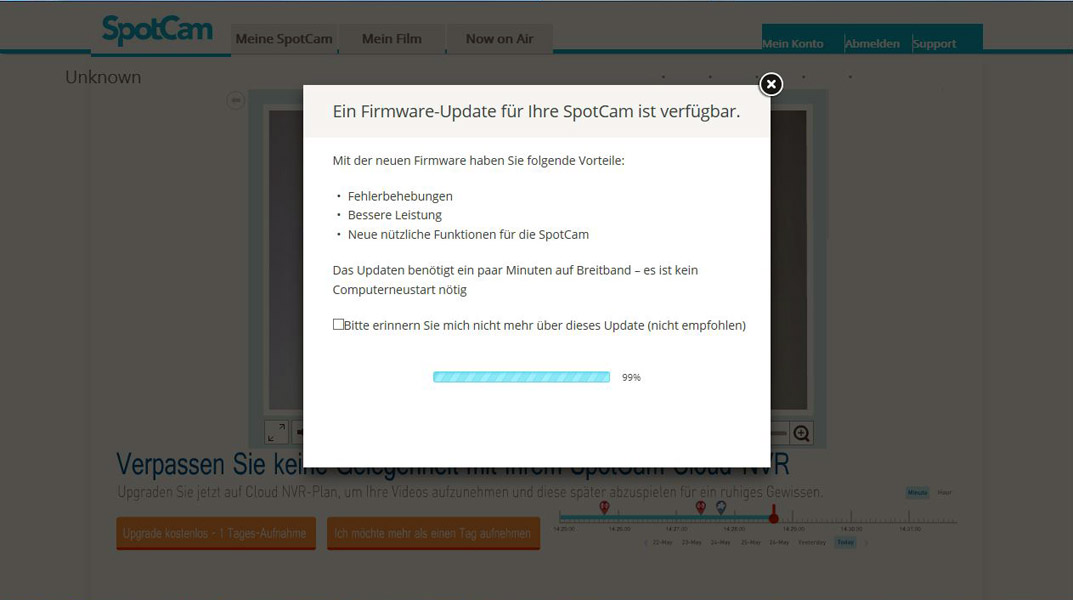
You will be informed online as soon as a SpotCam HD firmware update is available.

Of course, we tried this directly and uploaded the latest firmware to the SpotCam HD, which ran smoothly.
Read the SpotCam HD Cloud Camera Review …
Discuss the SpotCam HD in the forum and exchange experiences …